As RFID data is collected and filtered, there are a variety of options in terms of how it can be exported from TagMatiks Wedge to be used in other systems. The export configuration allows you to specify what data and format is exported.
Options include
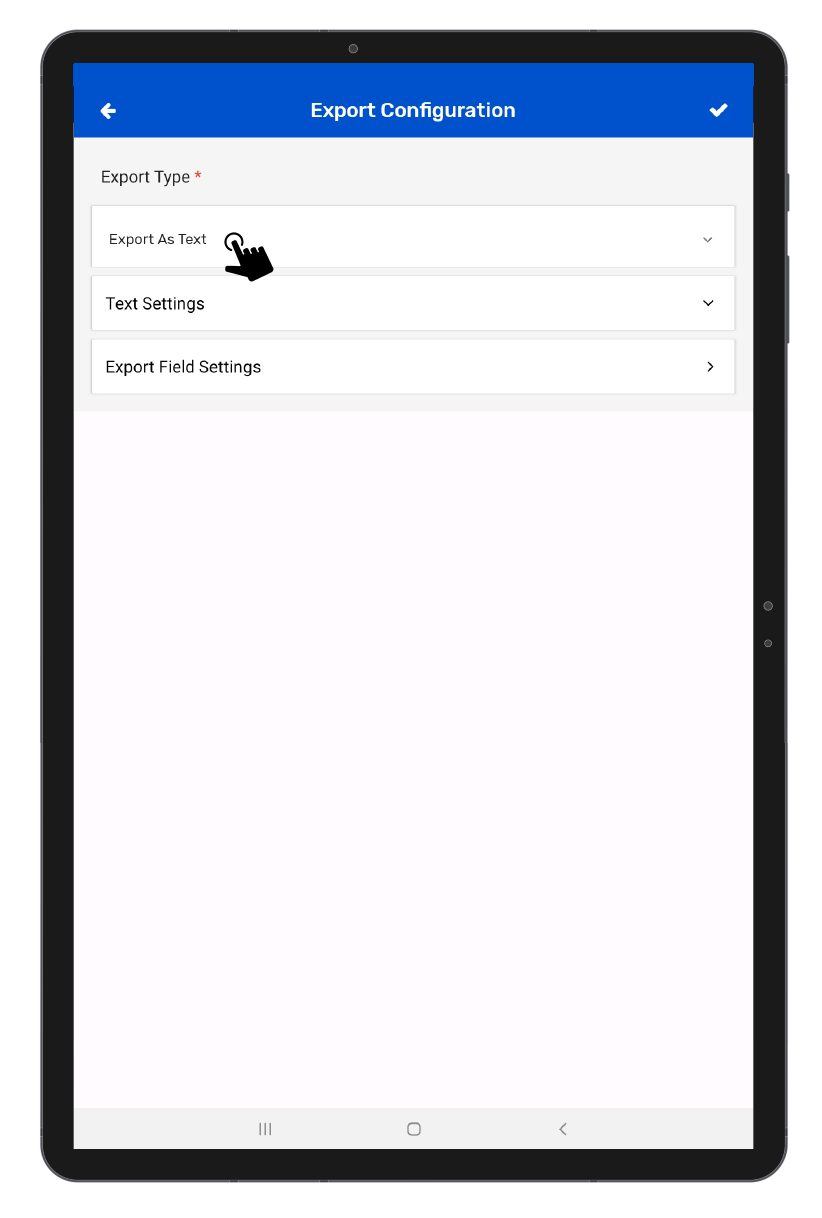
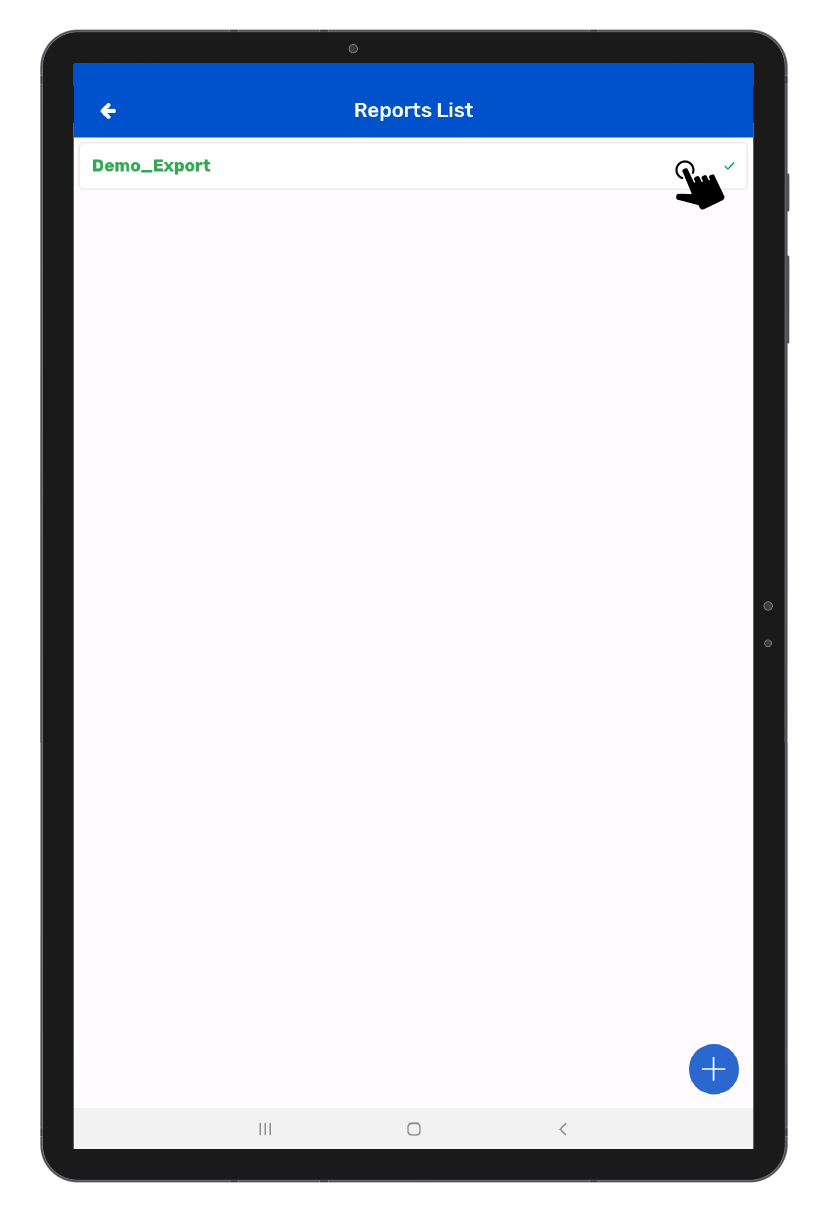
Navigate to export configuration by Menu -> Application Configuration -> Export Configurations.
Then select the export type as “Export As Text”, from the drop-down list.
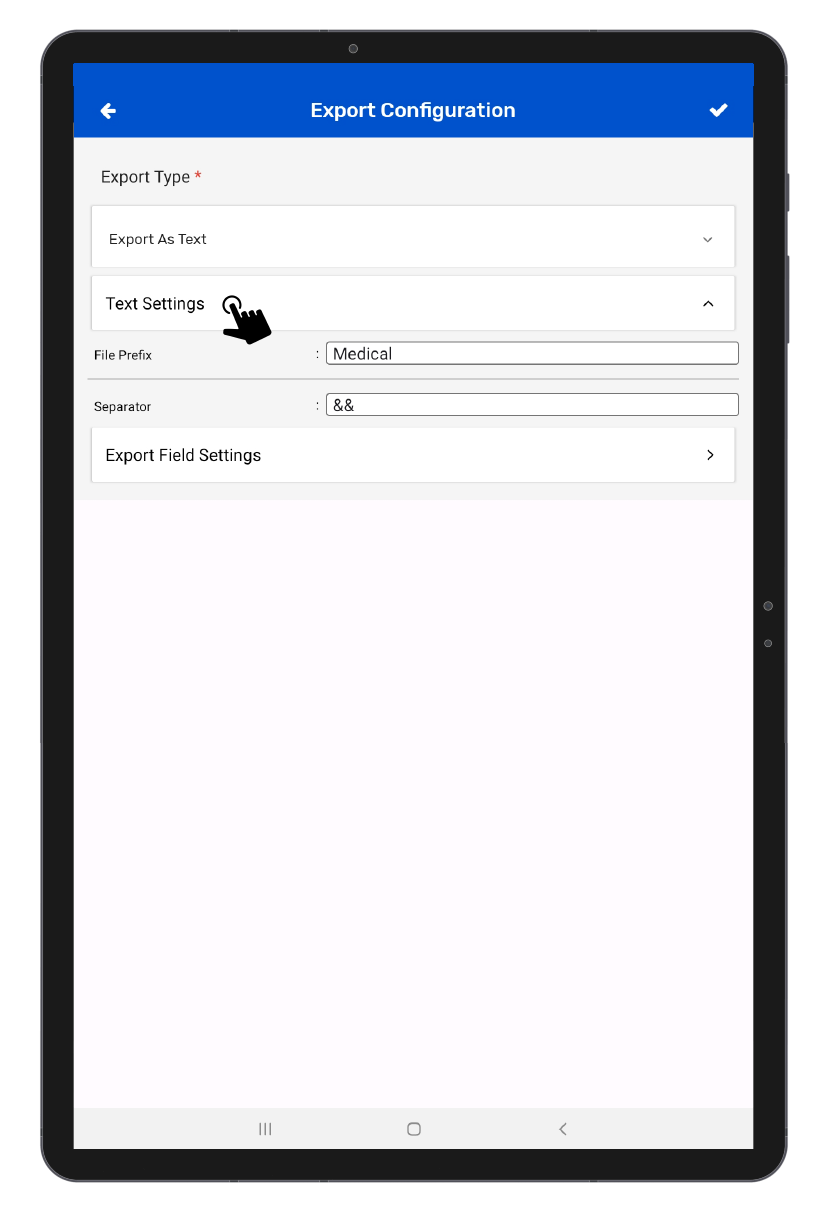
Click on Text Settings, it will expand to provide additional options.
File Prefixes are used as a prefix for a file name when exporting it in inventory.
A separator is used as a separator for each value when exporting the report. If there is no separator provided then by default comma(,) will be used as a separator.
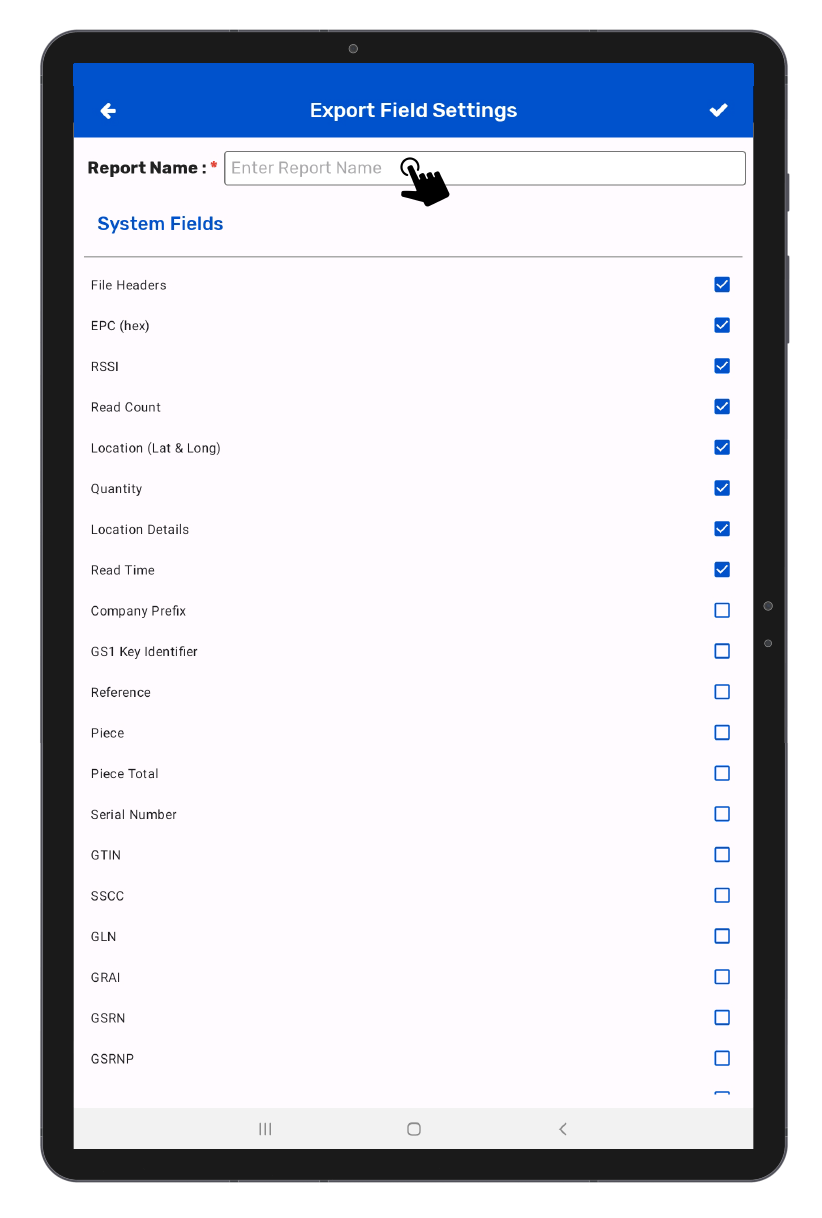
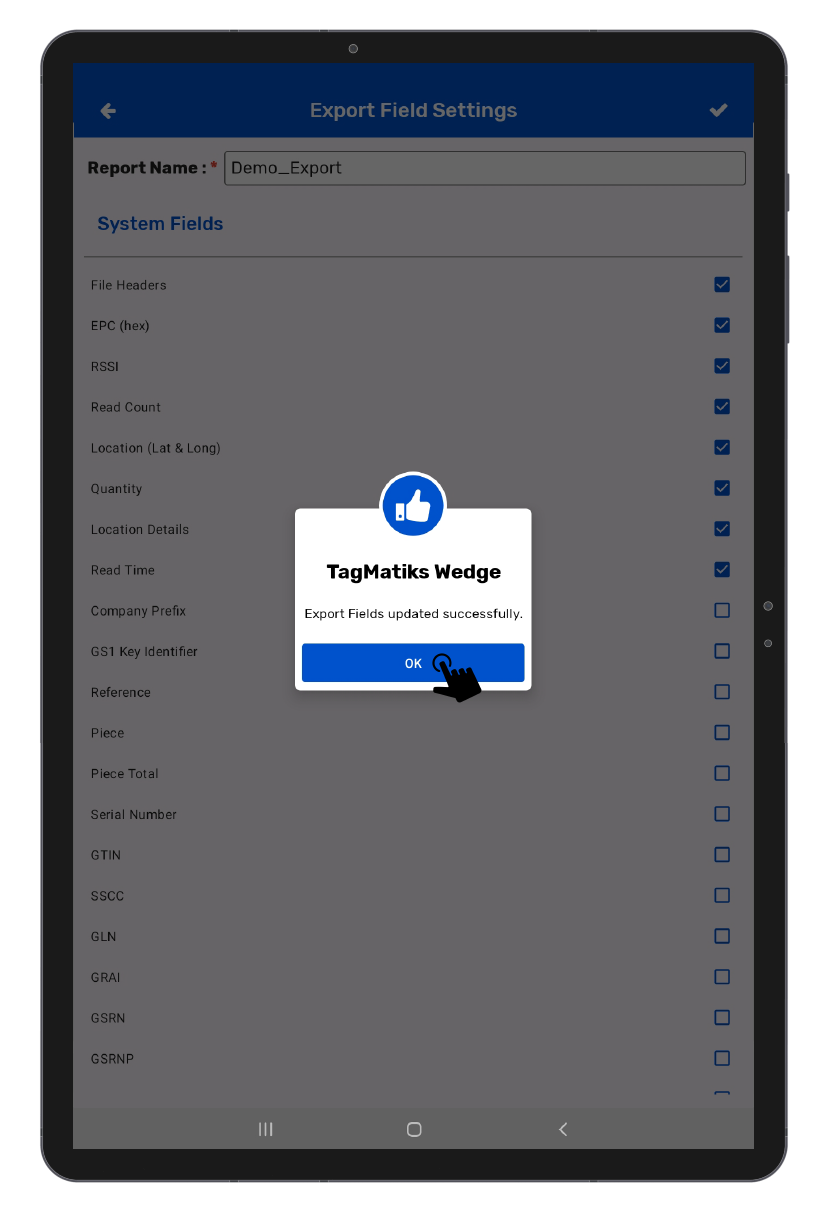
To choose what data is exported, click on Export Field Settings. Select the fields which you want to see in the exported file. You can select the attributes from System Fields and Reference Fields as shown in the image below.
Note : Reference Fields are those attributes which are present in the Reference File.
Enter the Report name and tap on () icon to save the Export Field Configuration. A notification will appear stating “Export Field Updated Successfully” as shown in the image below.
Similarly, you can create multiple Export Field profiles by tapping on the (+) icon and can select the profile according to the requirement.
Navigate to export configuration by Menu -> Application Configuration -> Export Configurations.
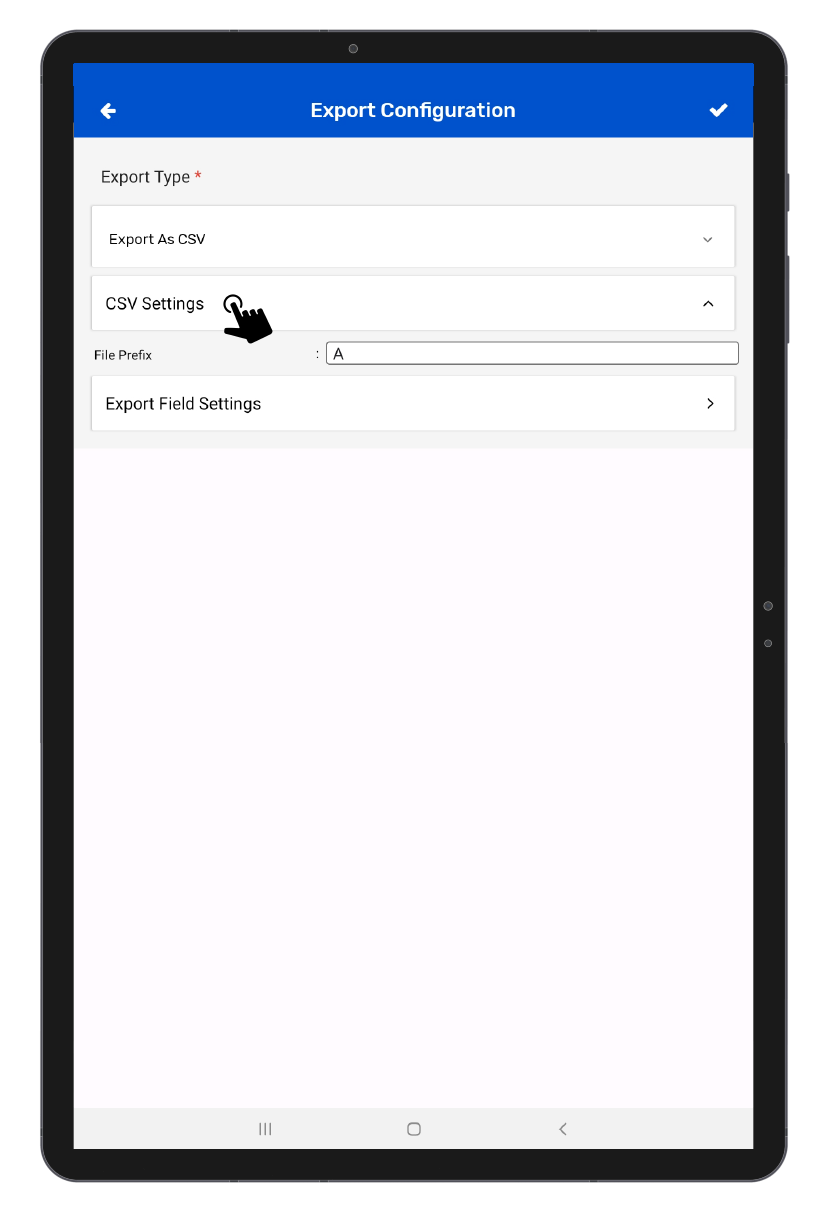
Then select the export type as “Export As CSV”, from the drop-down list.
Click on Text Settings, it will expand to provide additional options.
File Prefixes are used as a prefix for a file name when exporting it in inventory.
To choose what data is exported, click on Export Field Settings. Select the fields which you want to see in the exported file. You can select the attributes from System Fields and Reference Fields as shown in the image below.
Note : Reference Fields are those attributes which are present in the Reference File.
Enter the Report name and tap on (✔️) icon to save the Export Field Configuration. A notification will appear stating “Export Field Updated Successfully” as shown in the image below.
Similarly, you can create multiple Export Field profiles by tapping on the (+) icon and can select the profile according to the requirement.
Navigate to export configuration by Menu -> Application Configuration -> Export Configurations.
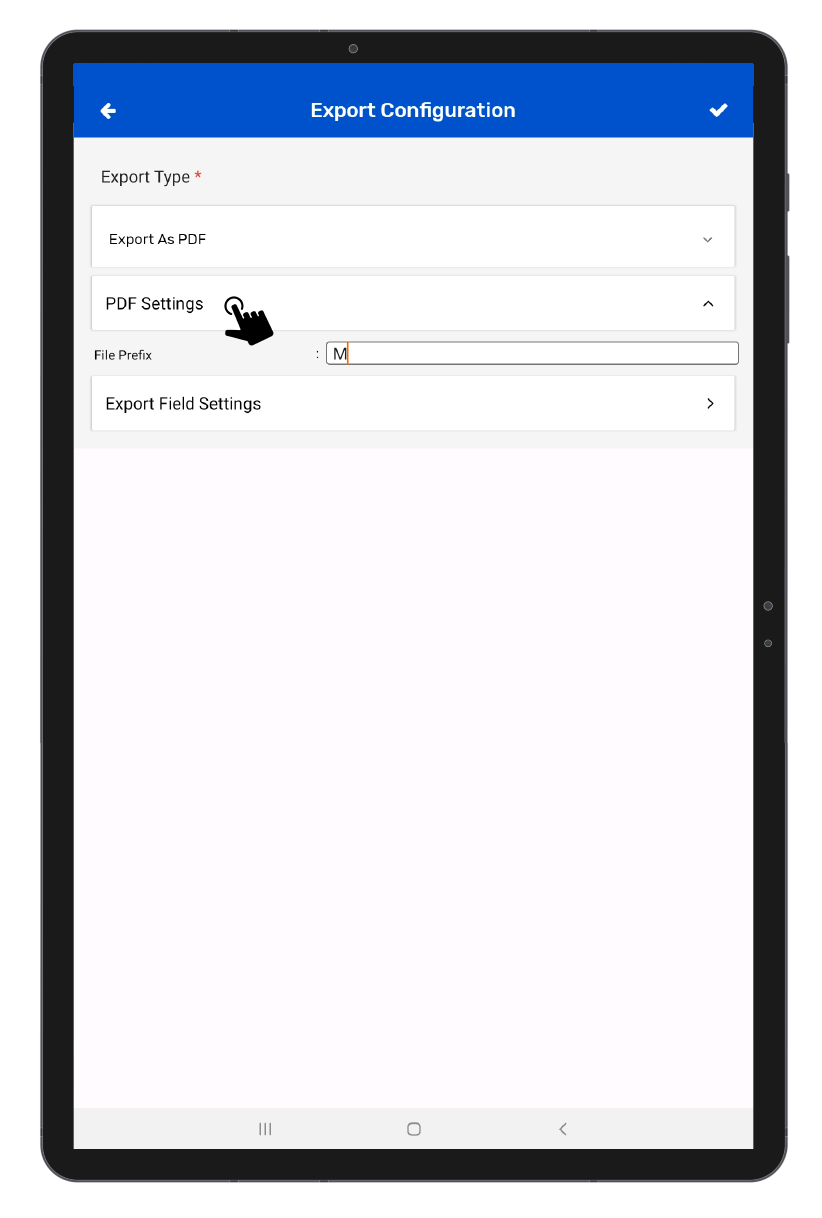
Then select the export type as “Export As PDF”, from the drop-down list.
Click on Text Settings, it will expand to provide additional options.
File Prefixes are used as a prefix for a file name when exporting it in inventory.
To choose what data is exported, click on Export Field Settings. Select the fields which you want to see in the exported file. You can select the attributes from System Fields and Reference Fields as shown in the image below.
Note : Reference Fields are those attributes which are present in the Reference File.
Enter the Report name and tap on (✔️) icon to save the Export Field Configuration. A notification will appear stating “Export Field Updated Successfully” as shown in the image below.
Similarly, you can create multiple Export Field profiles by tapping on the (+) icon and can select the profile according to the requirement.
Navigate to export configuration by Menu -> Application Configuration -> Export Via Share Activity.
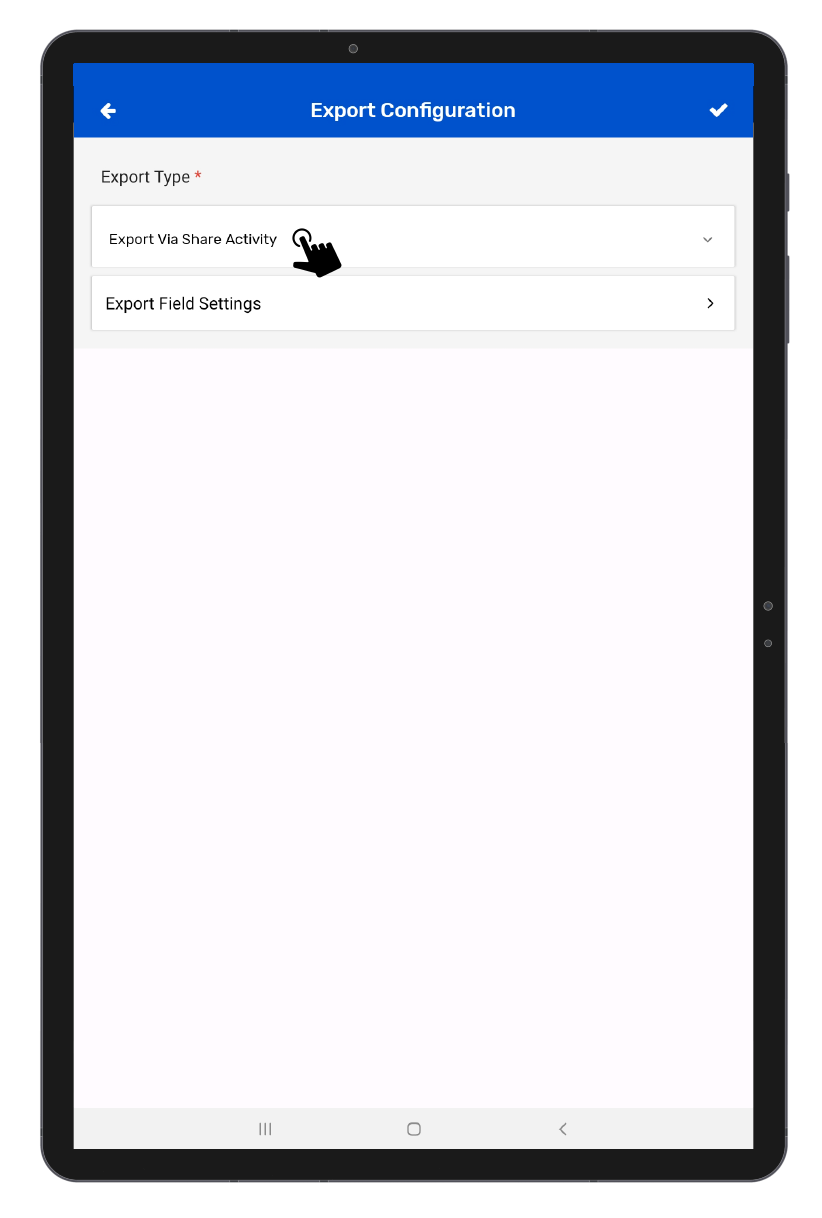
Then select the export type as “Export Via Share Activity”, from the drop-down list.
To choose what data is exported, click on Export Field Settings. This opens a list of Fields supported to export. At least one field must be selected to use the full capabilities of TagMatiks Wedge.
Note : Reference Fields are those attributes which are present in the Reference File.
Enter the Report name and tap on () icon to save the Export Field Configuration. A notification will appear stating “Export Field Updated Successfully” as shown in the image below.
Similarly, you can create multiple Export Field profiles by tapping on the (+) icon and can select the profile according to the requirement.
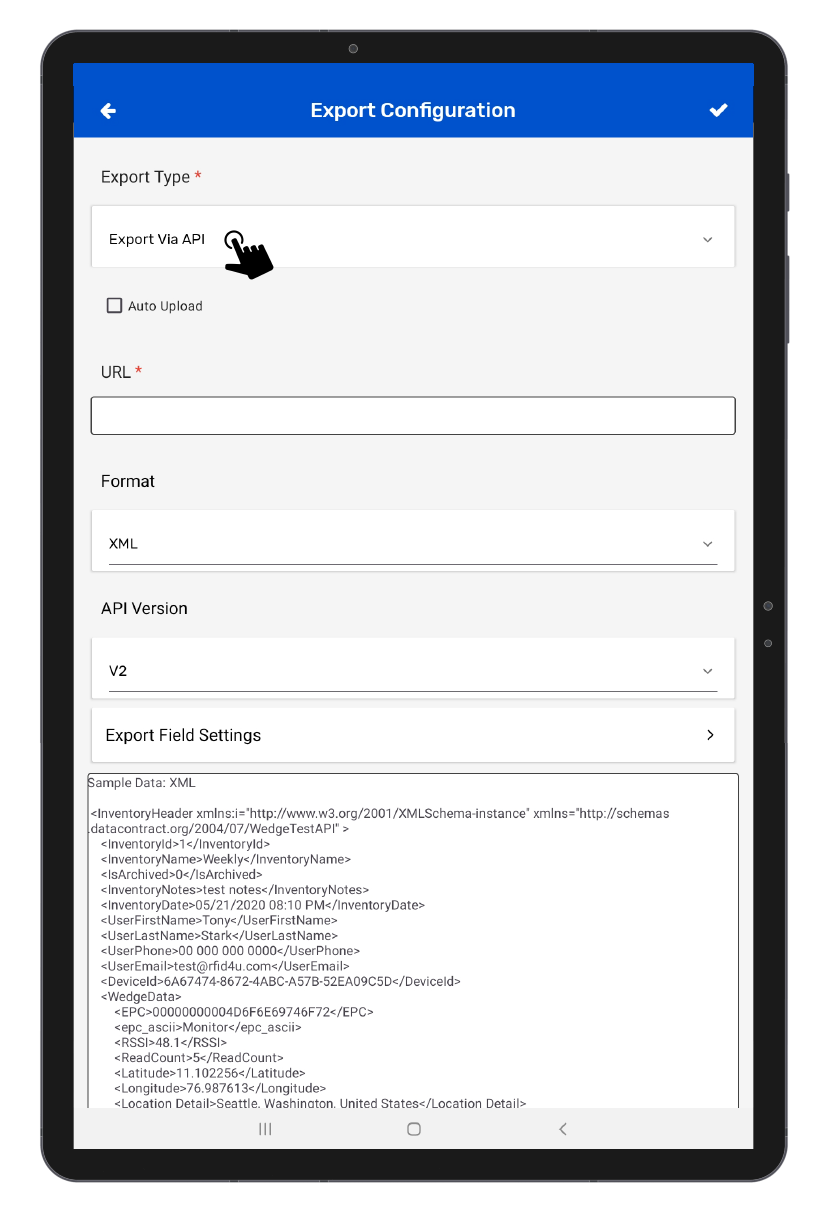
The export inventory using RESTful API makes it easy to quickly integrate RFID data to other systems.
Navigate to export configuration by Menu -> Application Configuration ->Export Configuration—> Select Export as via API.
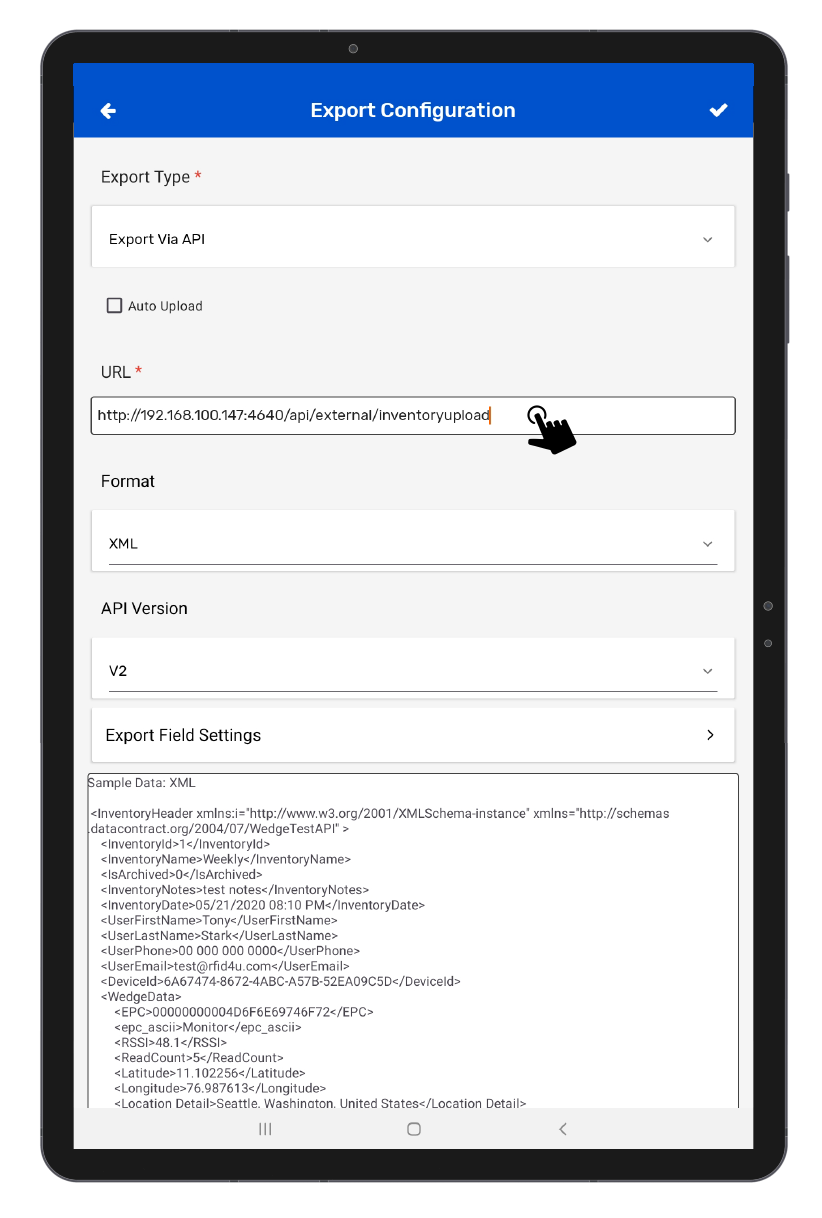
URL is the API endpoint to which the Exported Data must be sent. A valid URL must be given to proceed
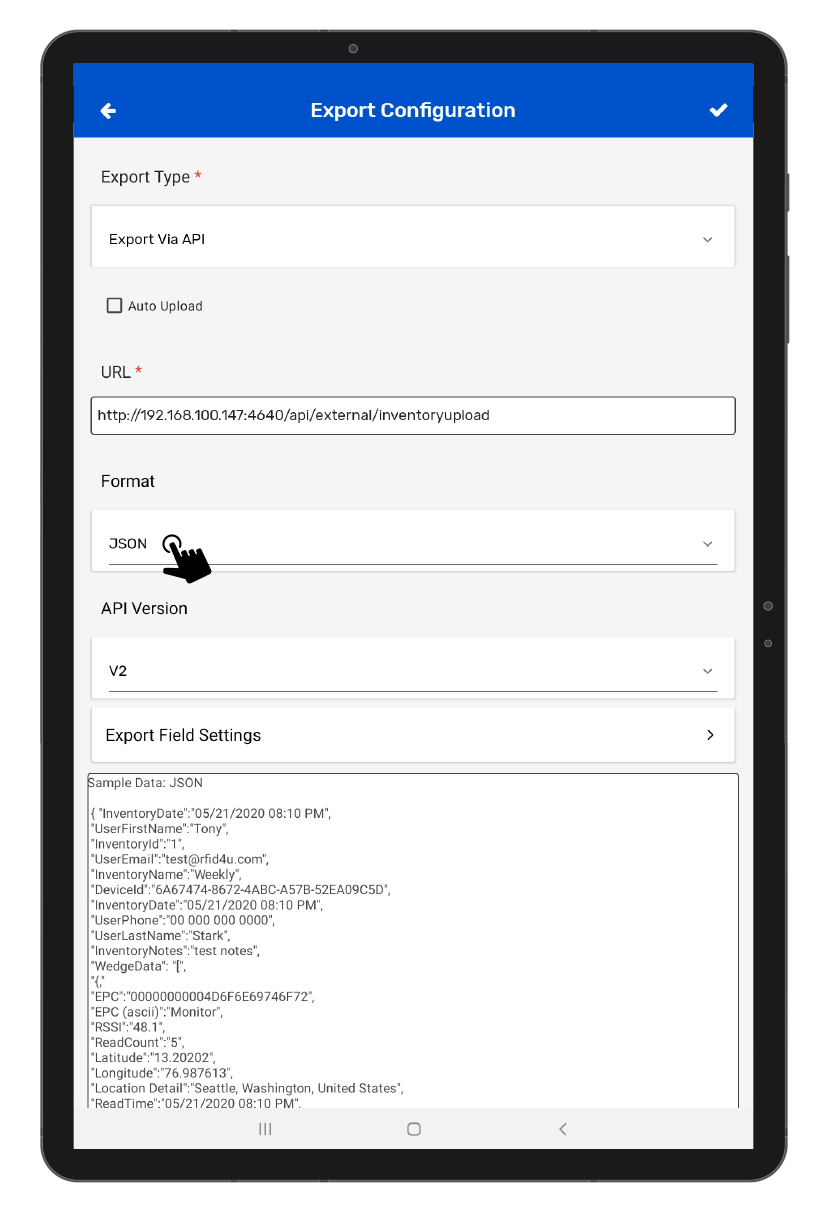
We support exporting data to RESTful API by using JSON or XML format as described in the sample data format.
We having the two different version V1 & V2
V1 API returns the limited fields like the System & Reference fields (Based on the Import file).
| Parameter | Data Type | Value |
|---|---|---|
| EPC (hex) | String | 534E3A313233393837363935 |
| EPC (ascii) | String | SN:123987695 |
| RSSI | String | 48.1 |
| Read Count | String | 5 |
| Latitude | String | 76.987613 |
| Longitude | String | 11.102256 |
| Read Time | String | 5/21/2020 10:10:22 PM |
| Company Prefix | String | 1234567 |
| GS1 Key Identifier | String | SGTIN |
| Reference | String | 987654 |
| Piece | String | 1 |
| Piece Total | String | 1 |
| Serial Number | String | 1234567890 |
| GTIN | String | 1234567890 |
| SSCC | String | 1234567890 |
| GLN | String | 1234567890 |
| GRAI | String | 1234567890 |
| GIAI | String | 1234567890 |
| GSRN | String | 1234567890 |
| GSRNP | String | 1234567890 |
| GDTI | String | 1234567890 |
| CPI | String | 1234567890 |
| ITIP | String | 1234567890 |
| User Memory Bank | String | LOT-1234567 |
| Chip Manufacturer | String | Impinj |
| Chip Model | String | Monza 4E |
| Chip Serial Number | String | 12324324224 |
| Chip Serial Size (Bits) | String | 32 |
| Chip Serial Size (Bytes) | String | 4 |
| Chip Serial URI | String | 12336555969 |
| Sensor Status Type | String | Impact |
| Location Detail | String | Orlando, Florida, USA |
Sample JSON Data:
	 [
				   {
					 "EPC":"534E3A313233393837363935",
					 "EPCascii":"SN:123987695",
					 "RSSI":"-32.1",
					 "ReadCount":"5",
					 "Latitude":"11.102256",
					 "Longitude":"76.987613",
					 "ReadTime":"08/03/2020 10:00:02 PM",
					 "EPCBank":"AAAAAAAAAAAAAAAAAAAAAA11"
				   },
				   {
					 "EPC":"534E3A313233393837363935",
					 "EPCascii":"SN:123987695",
					 "RSSI":"-24",
					 "ReadCount":"2",
					 "Latitude":"13.20202",
					 "Longitude":"68.987468",
					 "ReadTime":"09/03/2020 11:32:21 AM",
					 "EPCBank":"AAAAAAAAAAAAAAAAAAAAAA12"
				   }
				]
V2 API returns the System & Reference fields (Based on the Import file) With Inventory details like Inventory Name, Notes, Inventory DateTime and User Details.
| Parameter | Data Type | Value |
|---|---|---|
| InventoryId | Int | 1 |
| IsArchieved | Int | 0 |
| InventoryName | String | Weekly |
| InventoryNotes | String | Test Notes |
| InventoryDate | String | 5/21/2020 10:10:22 PM |
| UserFirstName | String | Tony |
| UserLastName | String | Stark |
| UserPhone | String | 000-000-000 |
| UserEmail | String | test@rfid4u.com |
| InventoryItems | Array | System Fields |
Sample JSON Data
			{
			   "InventoryDate": "05/21/2020 08:10:22 PM",
			   "UserFirstName": "Tony",
			   "InventoryId": "1",
			   "UserEmail": "test@rfid4u.com",
			   "InventoryName": "Weekly",
			   "DeviceId": "6A67474-8672-4ABC-A57B-52EA09C5D",
			   "WedgeData": [
				   {
					   "GSRNP": "1234567890",
					   "STIDURI": "urn:epc:stid:x801.x170.x11EF6D27097B",
					   "ChipModel": "Monza 4E",
					   "GSIN": "1234567890",
					   "EPC": "00000000004D6F6E69746F72",
					   "GSRN": "1234567890",
					   "ChipSerialSizeBits": "32",
					   "GTIN": "1234567890",
					   "RSSI": "48.1",
					   "GCN": "1234567890",
					   "ReadCount": "5",
					   "CompanyPrefix": "1234567",
					   "GRAI": "1234567890",
					   "ChipSerialSizeBytes": "4",
					   "Longitude": "76.987613",
					   "EPC (ascii)": "Monitor",
					   "UPUI": "1234567890",
					   "GDTI": "1234567890",
					   "PGLN": "1234567890",
					   "Piece": "",
					   "SSCC": "1234567890",
					   "PieceTotal": "",
					   "UserBank": "LOT-1234567",
					   "Latitude": "11.102256",
					   "SerialNumber": "1234567890",
					   "ChipManufacturer": "Impinj",
					   "ReadTime": "05/21/2020 08:10:22 PM",
					   "GS1KeyIdentifier": "SGTIN",
					   "ITIP": "1234567890",
					   "Reference": "987654",
					   "ChipSerialNumber": "12324324224",
					   "GLN": "1234567890"
				   },
				   {
					   "GSRNP": "1234567890",
					   "STIDURI": "urn:epc:stid:x801.x170.x11EF6D27097B",
					   "ChipModel": "Higgs EC",
					   "GSIN": "1234567890",
					   "EPC": "00000000000000004350550A",
					   "GSRN": "1234567890",
					   "ChipSerialSizeBits": "32",
					   "GTIN": "1234567890",
					   "RSSI": "-24",
					   "GCN": "1234567890",
					   "ReadCount": "2",
					   "CompanyPrefix": "1234567",
					   "GRAI": "1234567890",
					   "ChipSerialSizeBytes": "4",
					   "Longitude": "76.987613",
					   "EPC (ascii)": "CPU",
					   "UPUI": "1234567890",
					   "GDTI": "1234567890",
					   "PGLN": "1234567890",
					   "Piece": "99",
					   "SSCC": "1234567890",
					   "PieceTotal": "1999",
					   "UserBank": "LOT-1234567",
					   "Latitude": "11.102256",
					   "SerialNumber": "1234567890",
					   "ChipManufacturer": "Alien Technology",
					   "ReadTime": "08/03/2020 10:00:02 PM",
					   "GS1KeyIdentifier": "ITIP",
					   "ITIP": "1234567890",
					   "Reference": "987654",
					   "ChipSerialNumber": "12324324224",
					   "GLN": "1234567890"
				   }
			   ],
			   "UserPhone": "00 000 000 0000",
			   "UserLastName": "Stark",
			   "InventoryNotes": "test notes"
		   }
You can verify the HTTP Post method is working right away after entering the URL and Format. Click on the Test Sample Data button at the bottom of the page.
To choose what data is exported, click on Export Field Settings. Select the fields which you want to see in the exported file. You can select the attributes from System Fields and Reference Fields as shown in the image below.
Note : Reference Fields are those attributes which are present in the Reference File.
Enter the Report name and tap on (✔️) icon to save the Export Field Configuration. A notification will appear stating “Export Field Updated Successfully” as shown in the image below.
Similarly, you can create multiple Export Field profiles by tapping on the (+) icon and can select the profile according to the requirement.