This guide provides a step-by-step workflow for integrating your Shopify inventory with the TagMatiks Wedge Android application. Through this integration, you can sync product data, perform RFID-based inventory counts, and update your Shopify stock levels seamlessly.
To support different business needs, the guide outlines two options:
By connecting Shopify’s e-commerce platform with TagMatiks Wedge, organizations gain improved visibility, streamlined operations, and accurate product data across their supply chain.
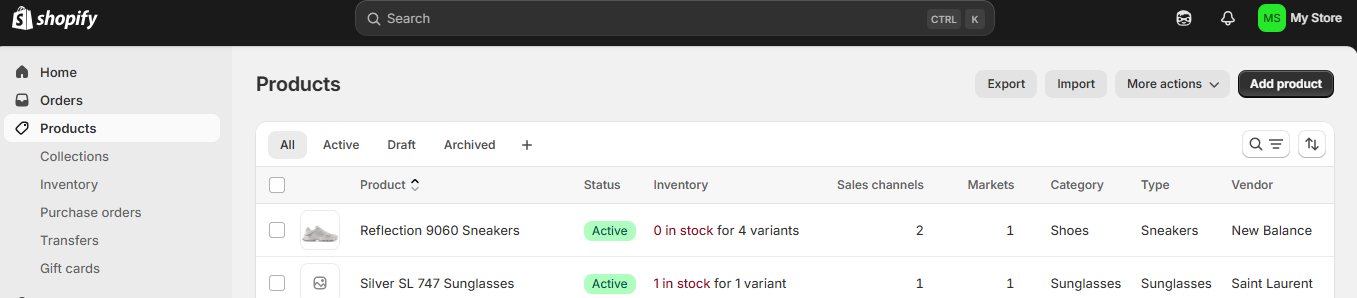
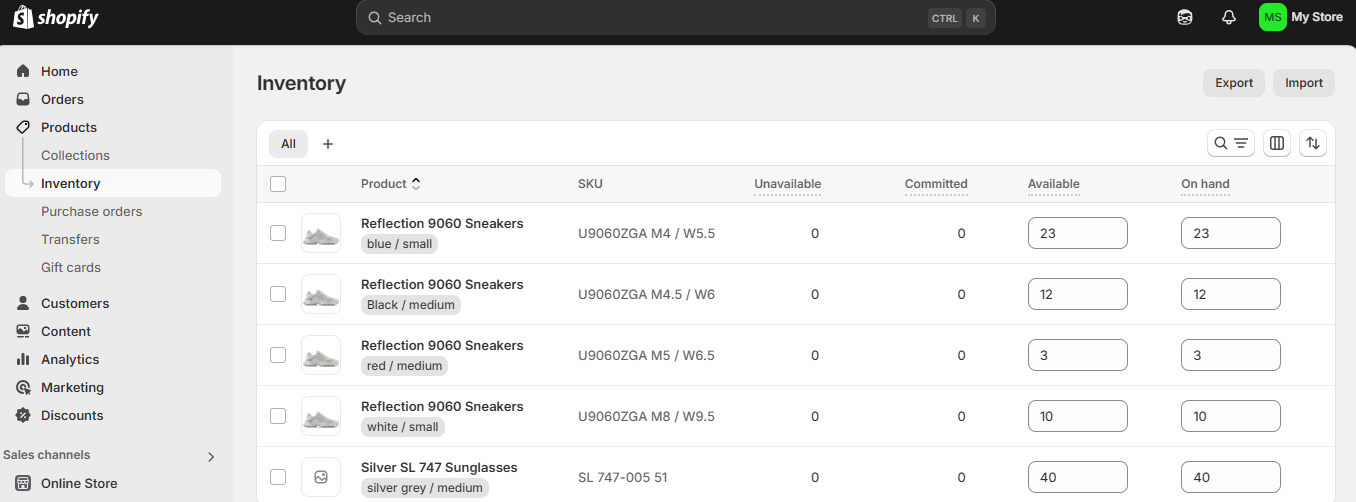
Step 1 :- Click on the Inventory option, you will redirect to the Inventory page.
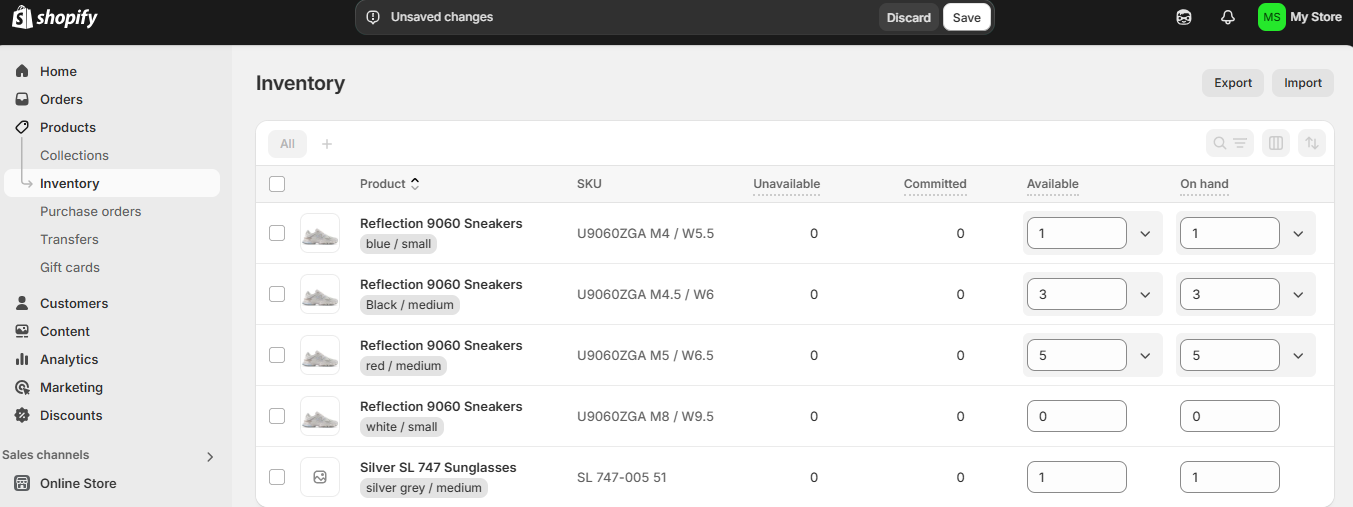
Step 2 :- Click on the Export option available on the right side of the page.
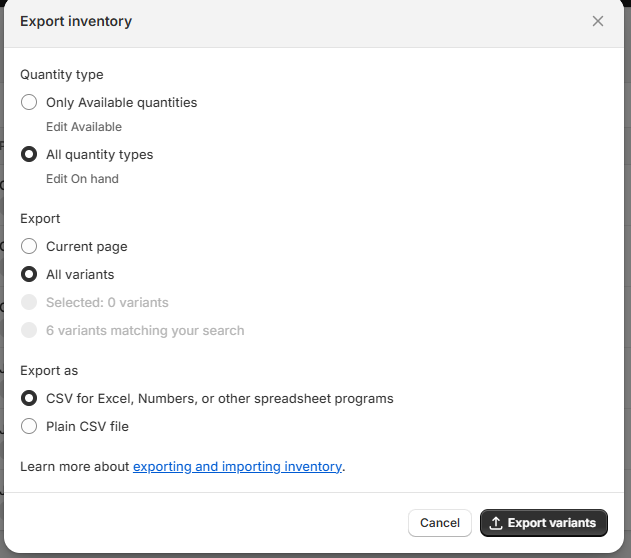
Step 3 :- After clicking on the Export option, a new window will pop up. In this window, you need to choose options such as 'All Quantity Types,' 'All Variants,' and 'Export as CSV for Excel/Numbers. Then Click on the “Export Variant” option.
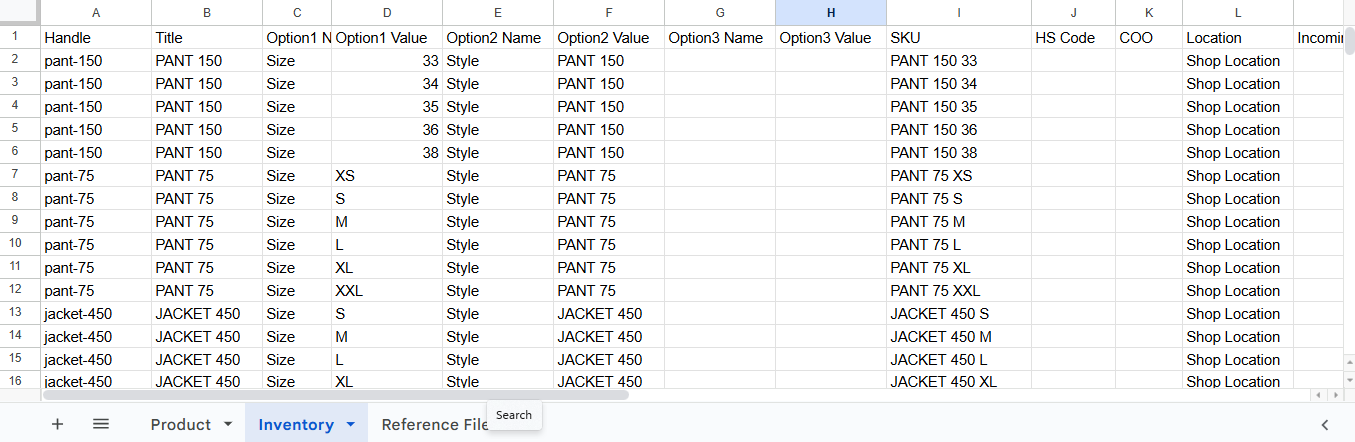
Step 4 :- Open the exported file, copy the data, and paste it into the template file we provided, specifically the 'Inventory' sheet.
Step 1 :- Click on the Product option, you will redirect to the Product page.
Step 2 :- Click on the Export option available on the right side of the page.
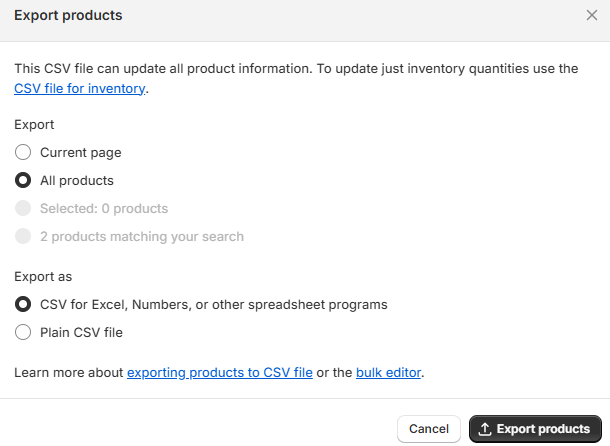
Step 3 :- After clicking on the Export option, a new window will pop up. In this window, you need to choose options such as 'All Products,' and 'Export as CSV for Excel/Numbers and Click on the Export Products option.
Step 4 :- Open the exported file, copy the data, and paste it into the template file we provided, specifically the ‘Products’ sheet.
Step 1 :- Open the template file (where you have already pasted the product and inventory data).
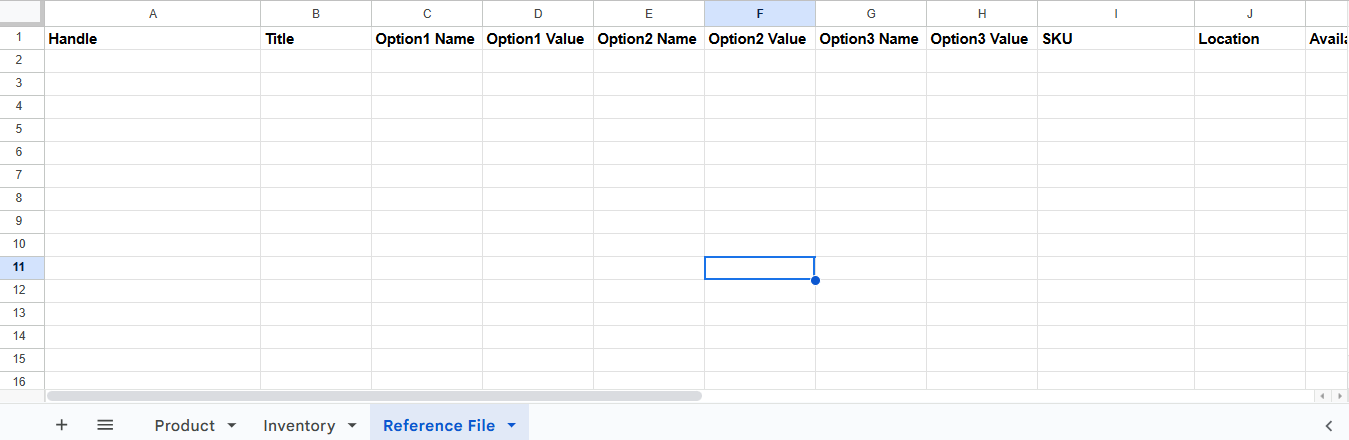
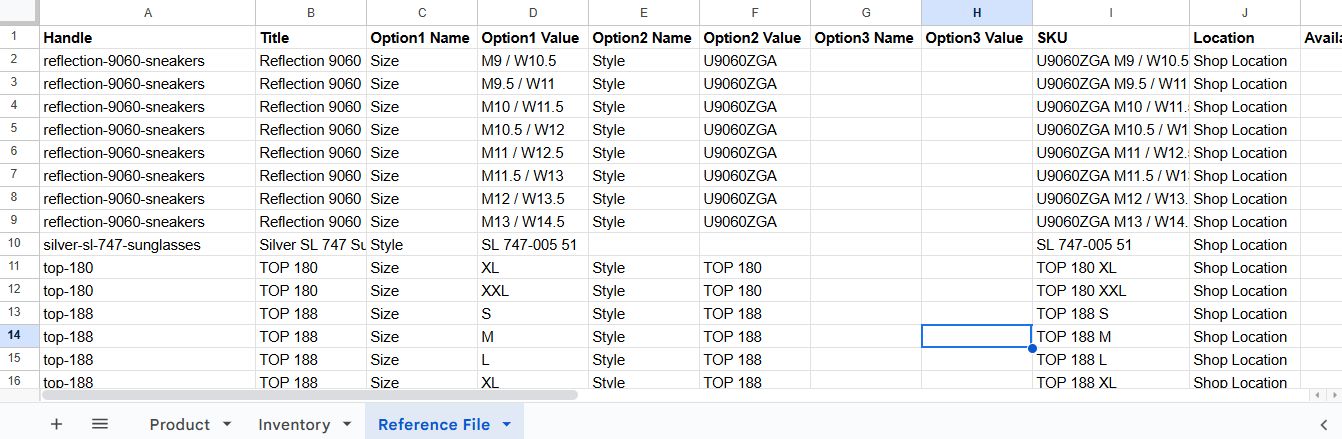
Step 2 :- Then In the Template, go to the Reference File sheet.
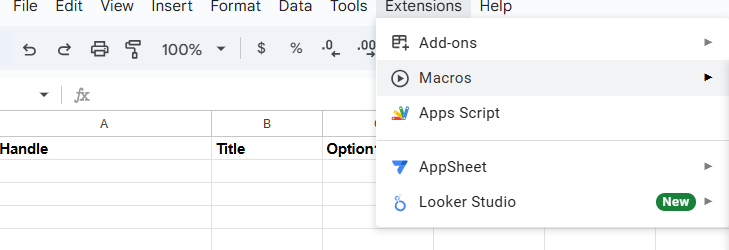
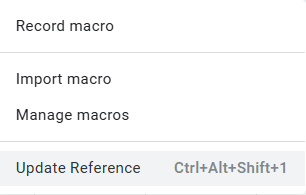
Step 3 :- Click on the extension button, and go to Macros.
Step 4 :- Click on the “Update Reference”.
Step 5 :- After clicking on the Update Reference option, the Reference File will be generated. Then, we need to download the same sheet in CSV format.
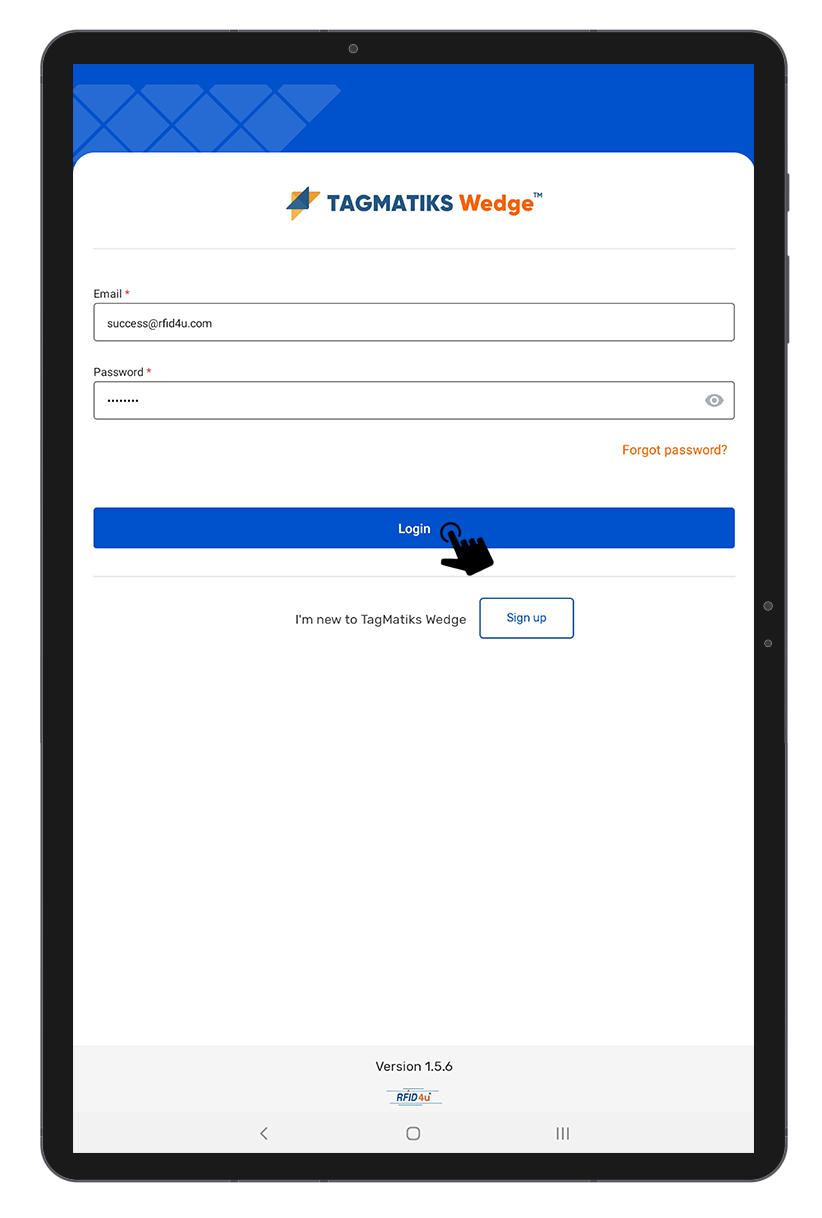
Step 1 :- Open TagMatiks Wedge Application and log into the application.
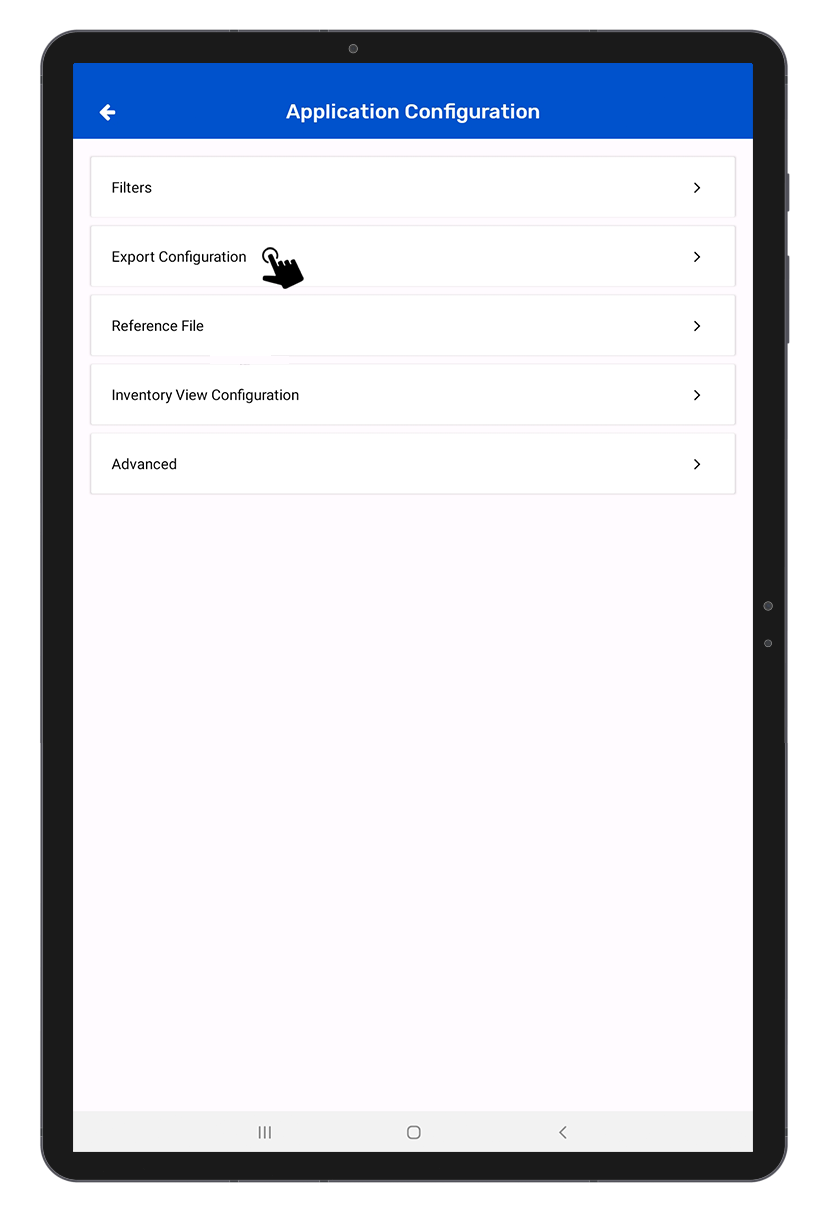
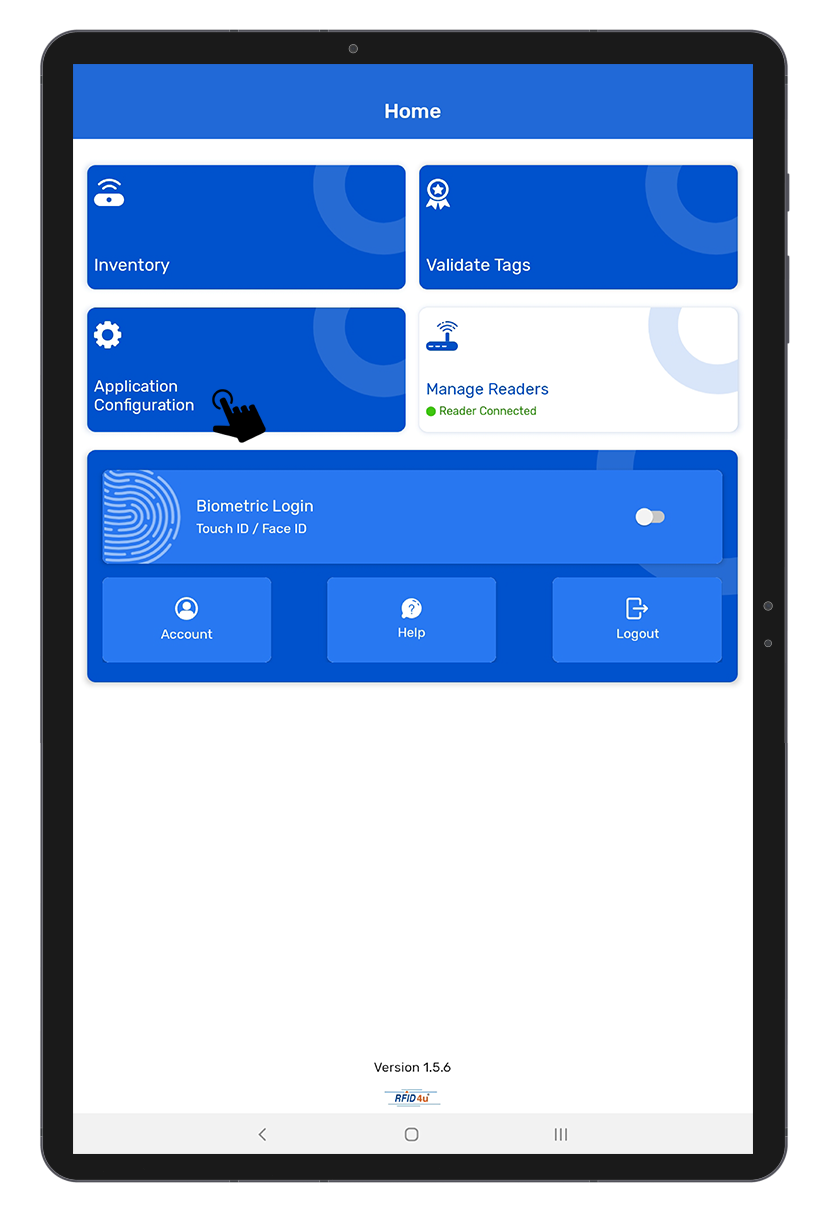
Step 2 :- Click on the “Application Configuration” option.
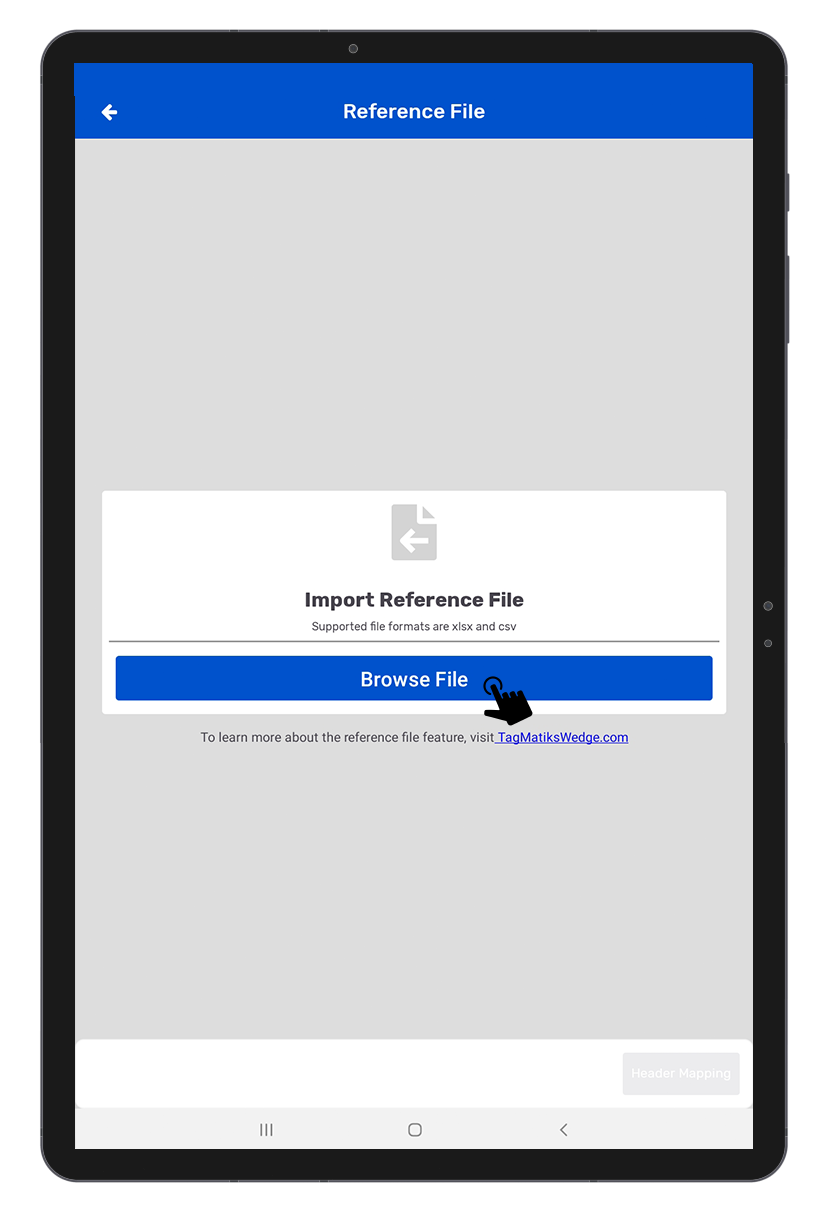
Step 3 :- Click on the “Reference File” option.
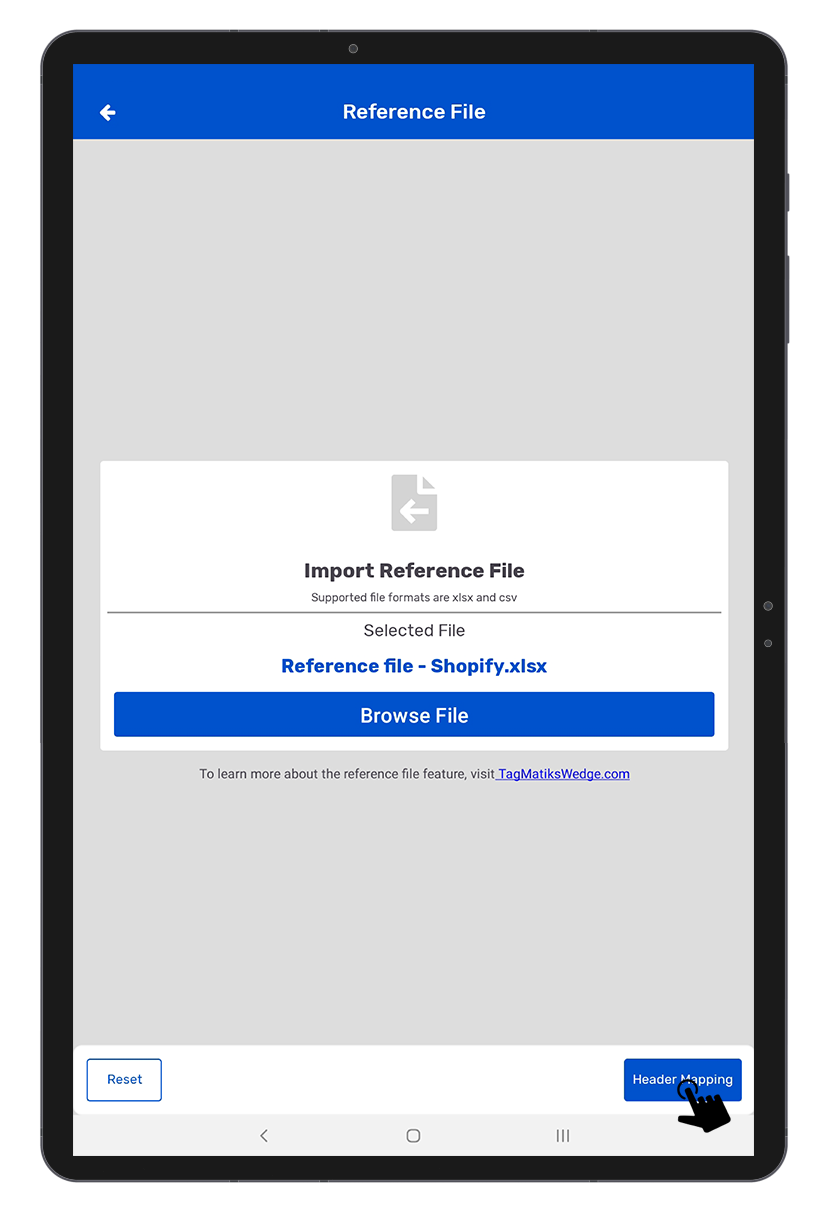
Step 4 :- Click on the “Browse File” option to browse your reference file.
Step 5 :- Select the Reference file.
Step 6 :- Click on the “Header Mapping” option.
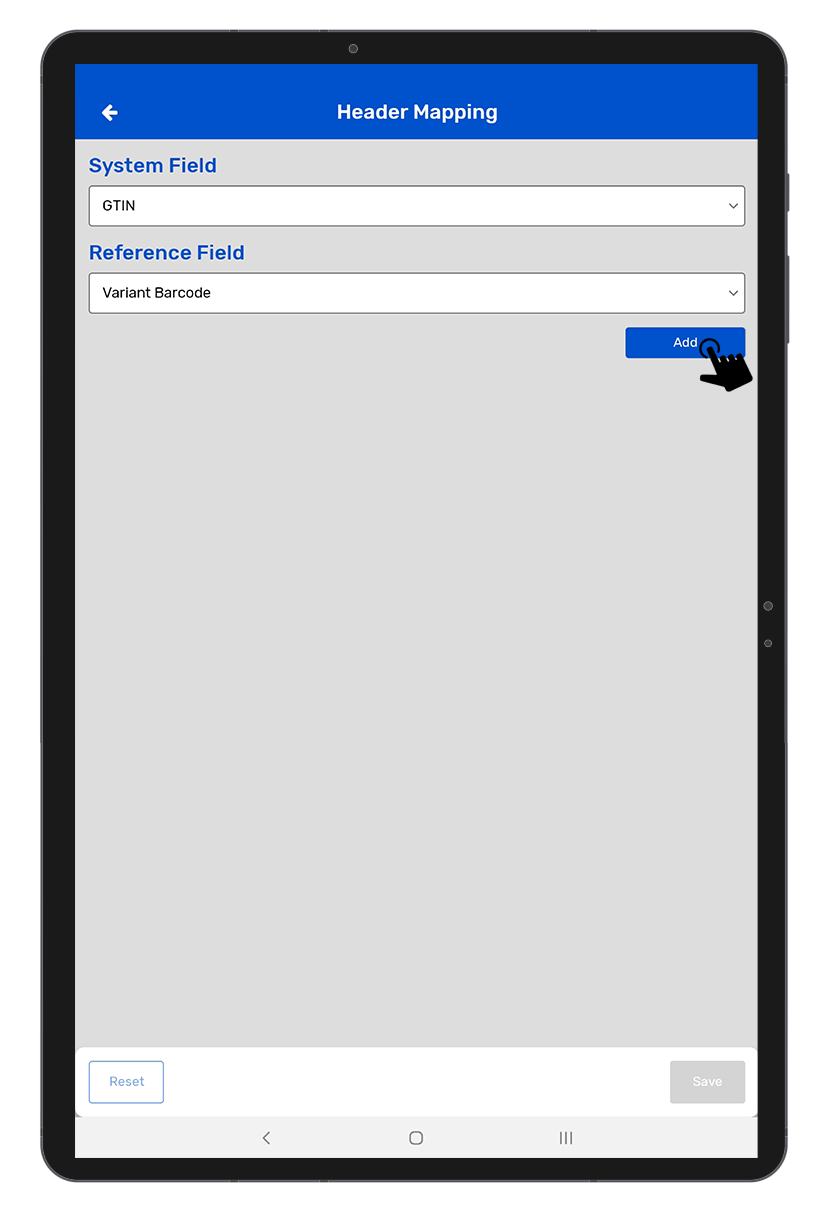
Step 7 :- Select the system field as GTIN.
Step 8 :- Select the reference field as Variant SKU.
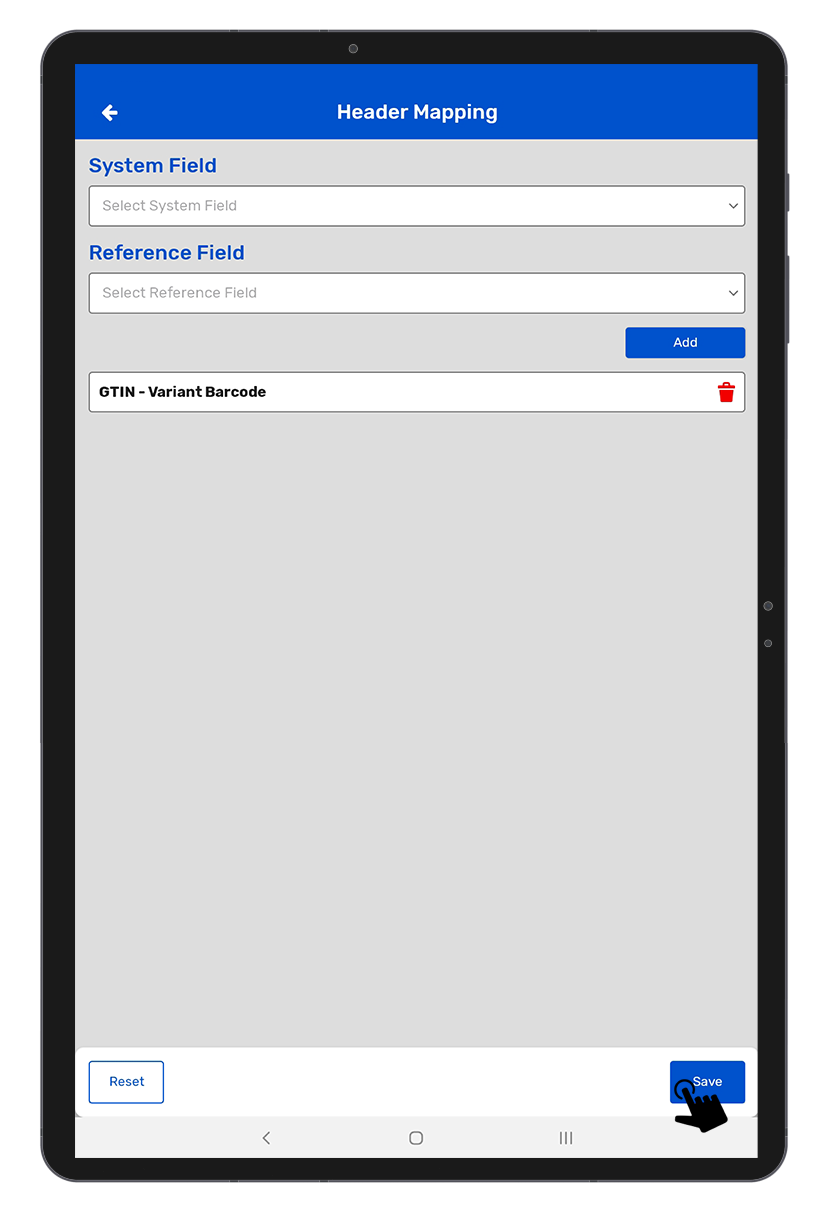
Step 9 :- Click on the “Add” button.
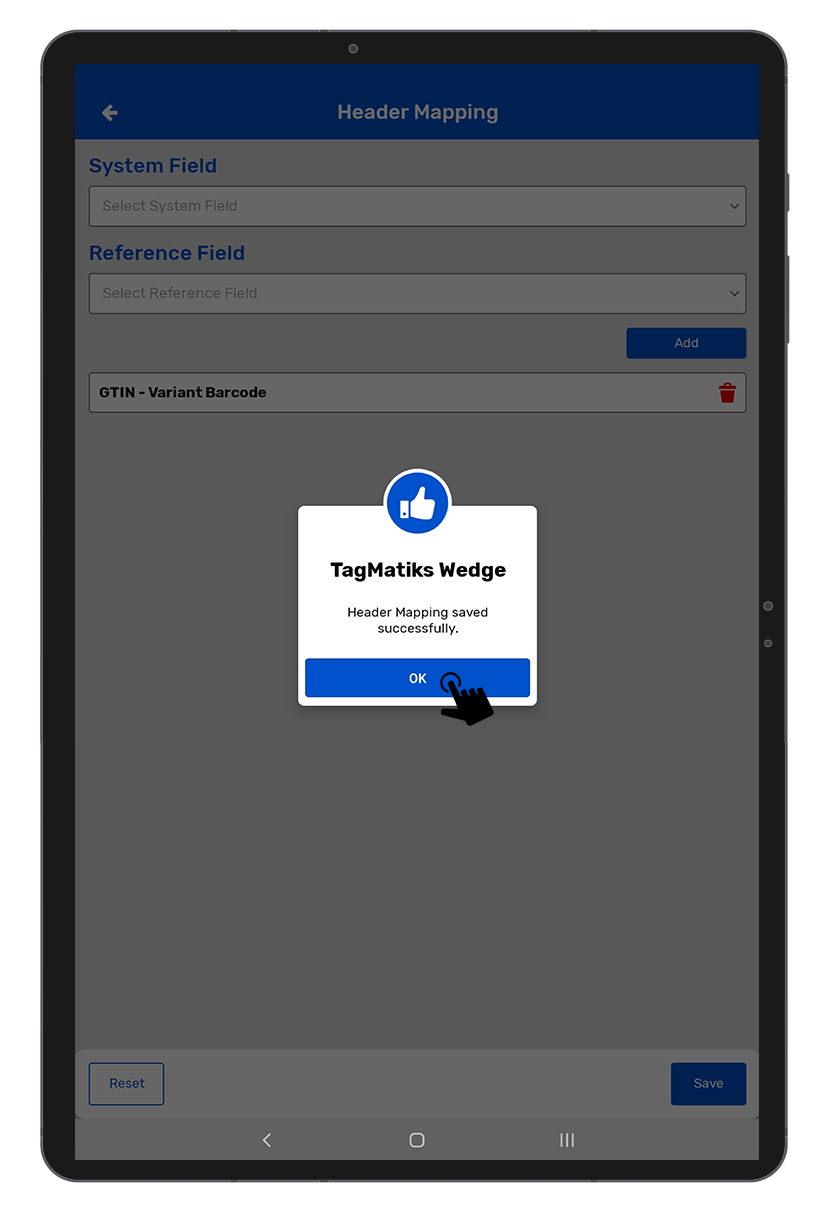
Step 10 :- Click on the “Save” button.
Note: After saving the setting for the reference file, it will redirect to the Inventory Configuration page.
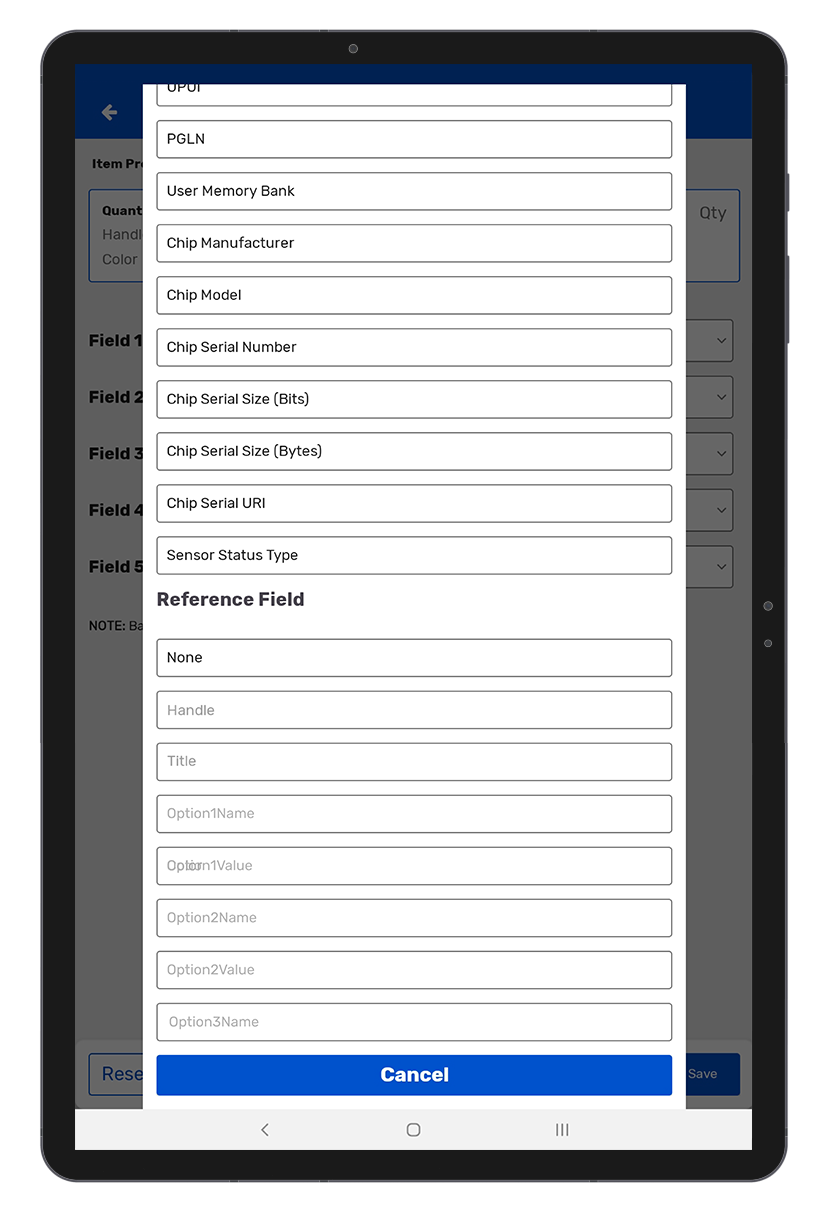
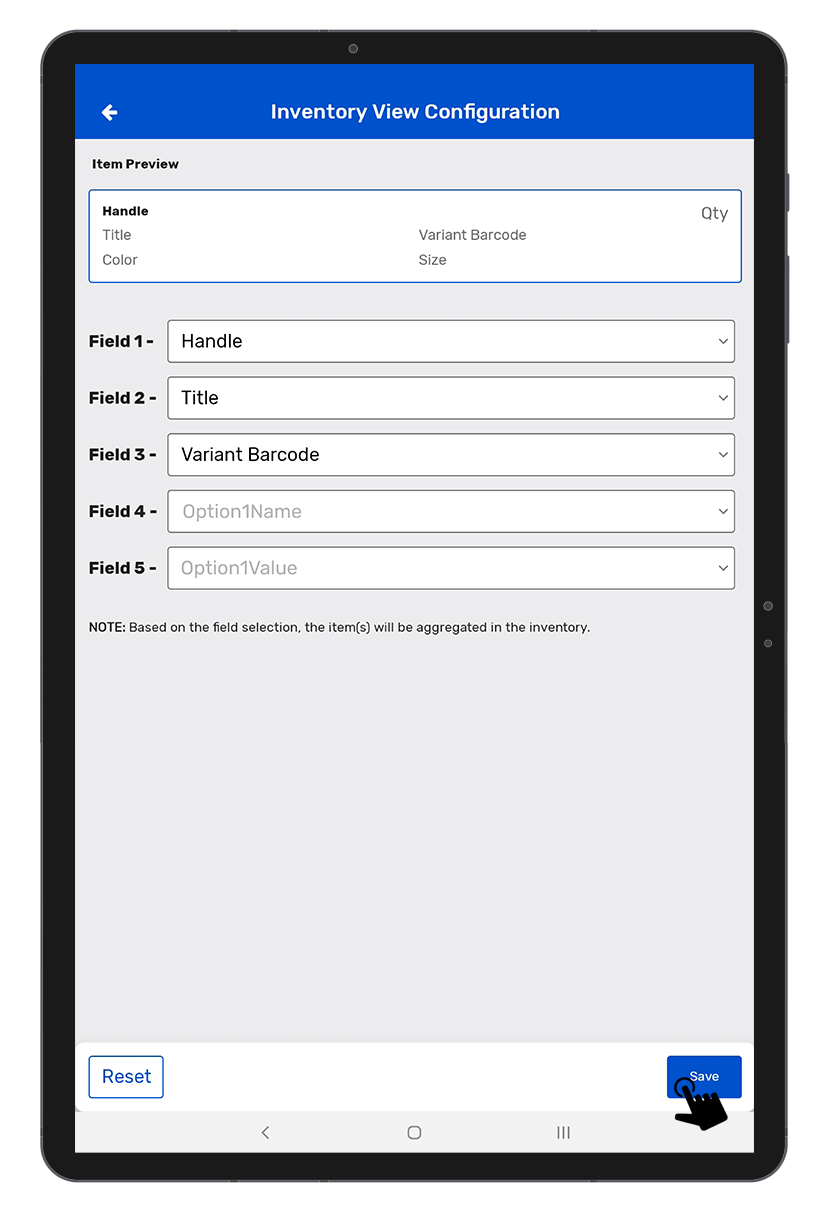
Step 11 :- Select the fields you want to display on the TagMatiks Wedge Application after the inventory.
Step 12 :- Click on the field dropdown option and choose the details you want on the TagMatiks Wedge page.
Suggestions for choosing fields:
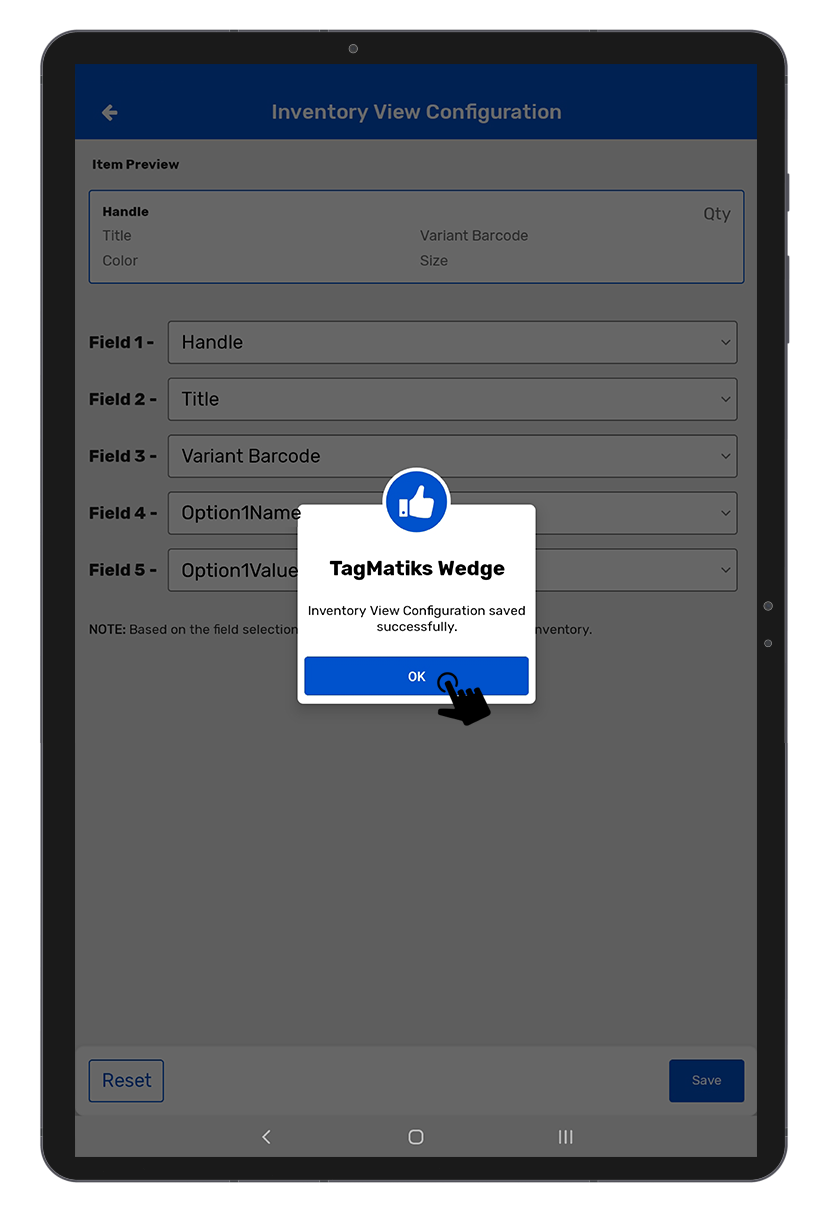
Step 13 :- Click on the “Save” button.
Export Configuration in TagMatiks Wedge Application:
Step 1 :- Open the TagMatiks Wedge Application and log into the application.
Step 2 :- Click on the “Application Configuration” option.
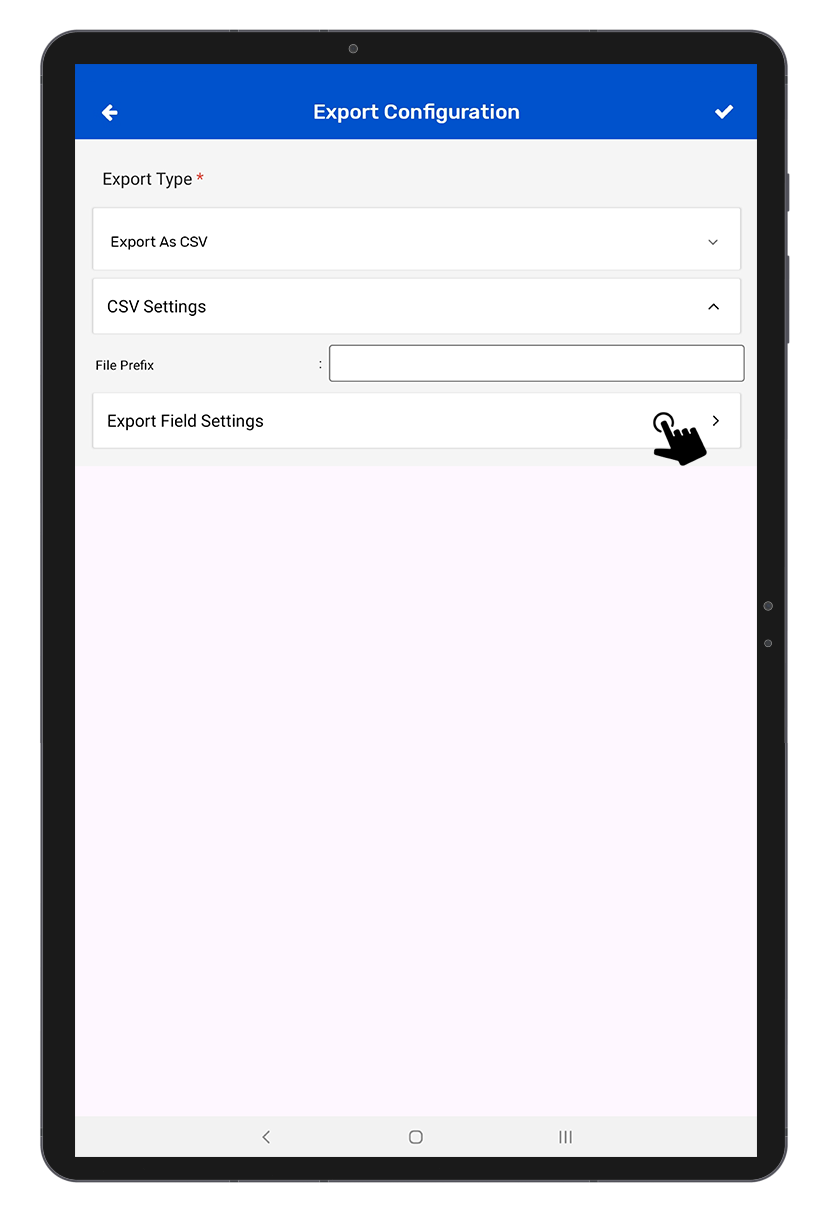
Step 3 :- Click on the “Export Configuration” option.
Step 4 :- Select the Export type as CSV as Shopify accepts only CSV format.
Step 5 :- Enter the file prefix.
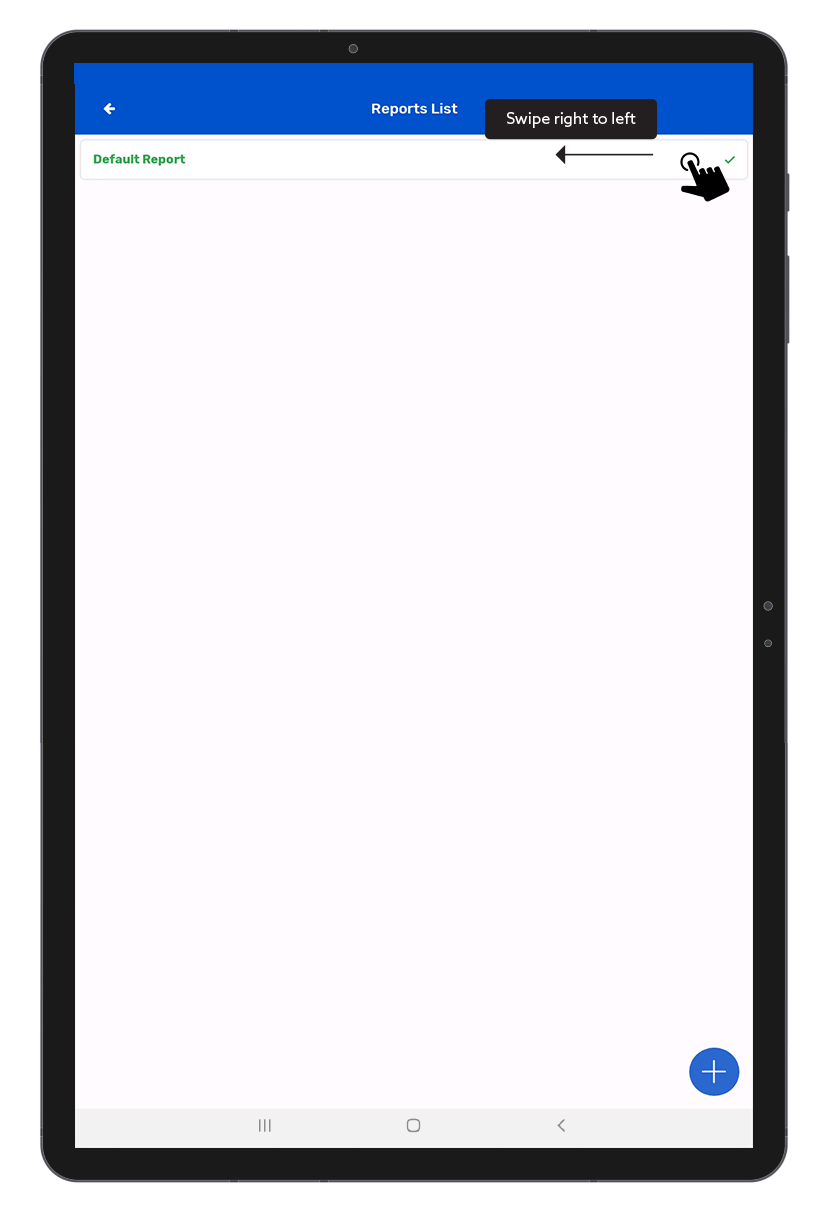
Step 6 :- Click on the “Field Settings” option, swipe left to right, and click on the edit icon.
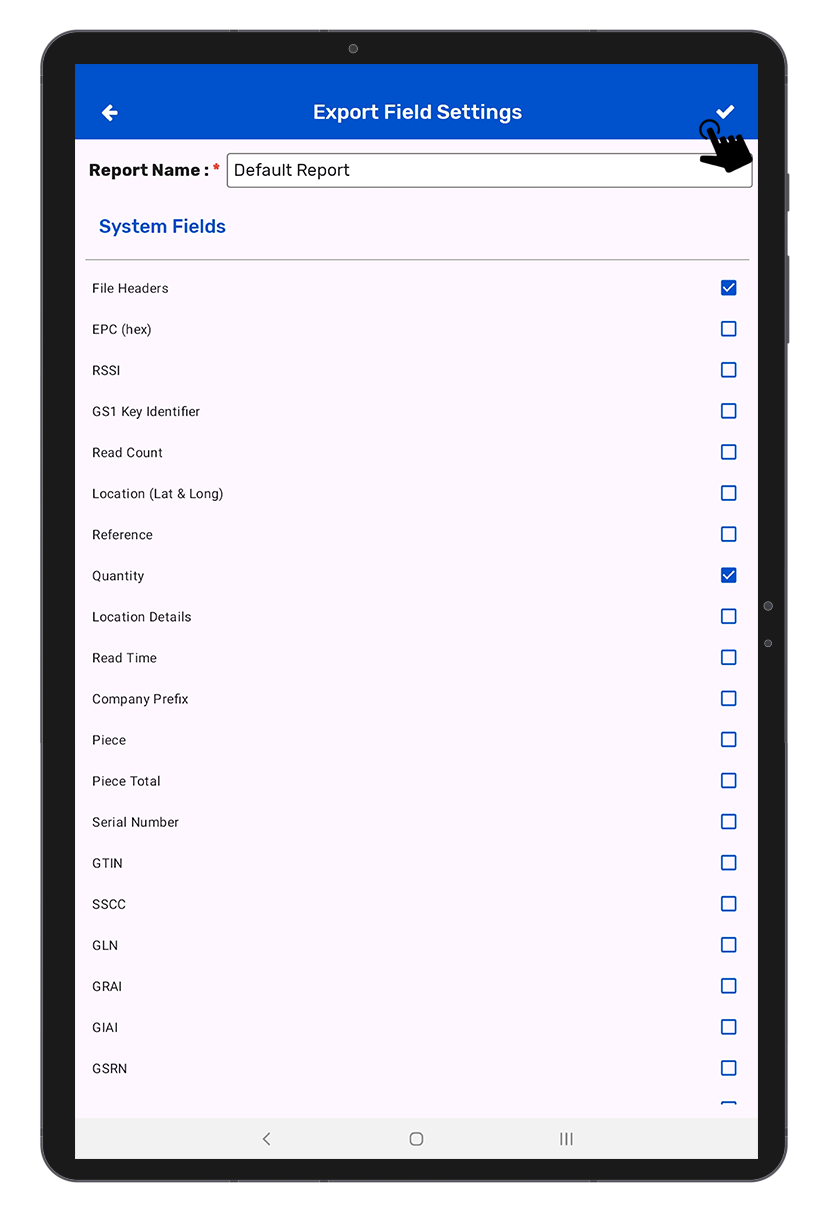
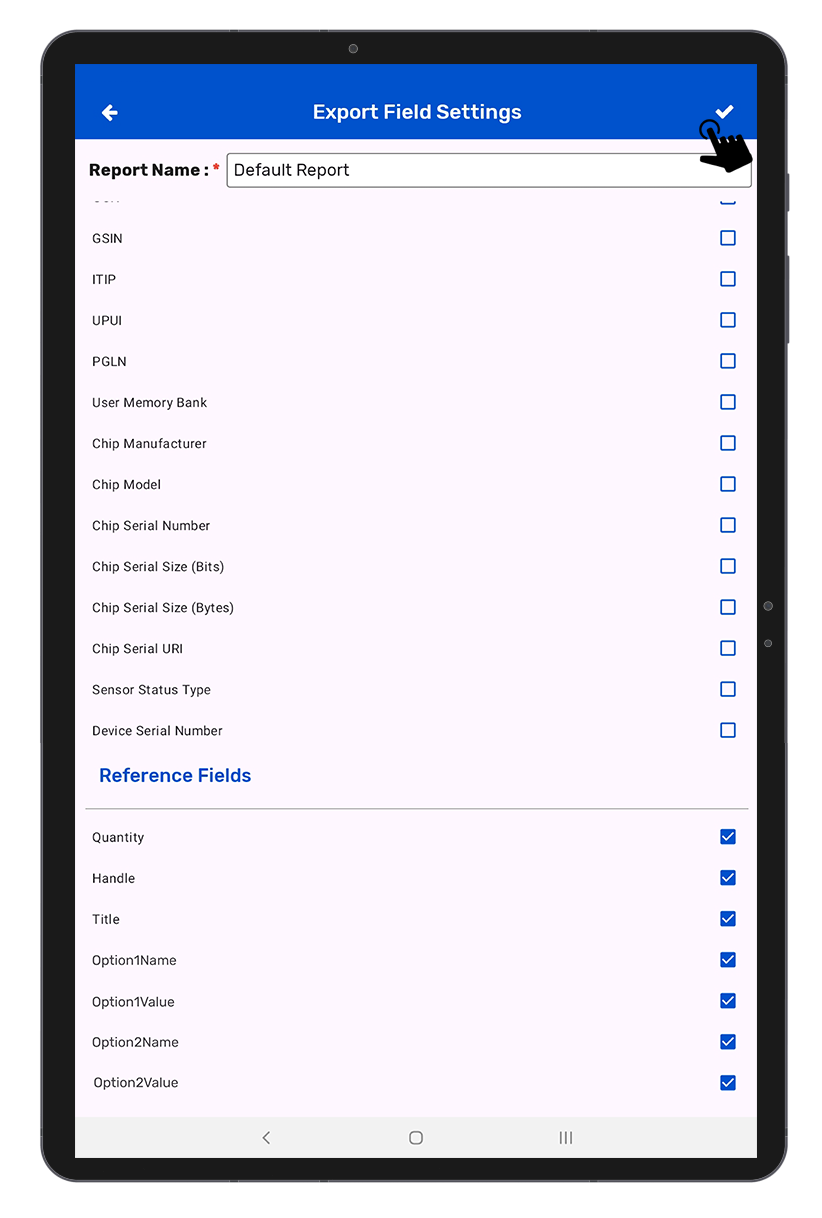
Step 7 :- Select the fields you want to see in your export file. Suggested fields are:
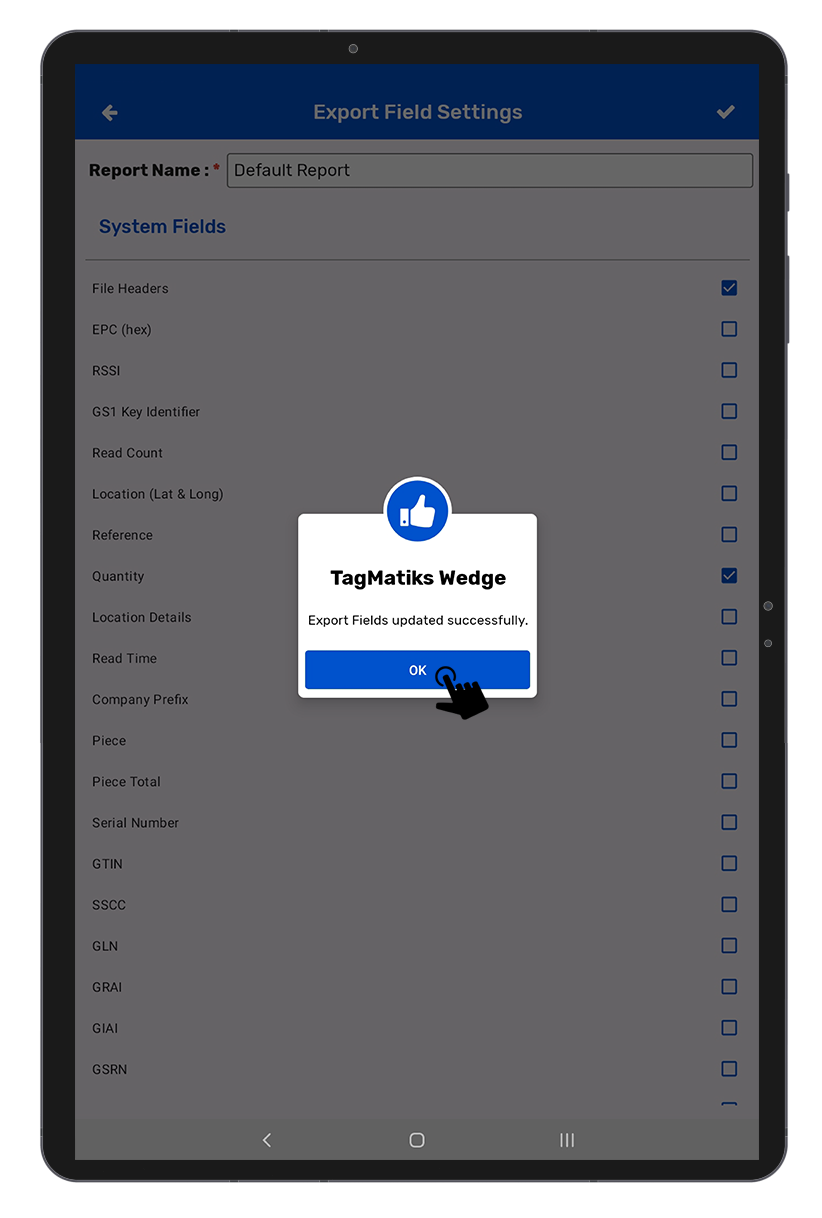
Step 8 :- Click on the ✔️ icon (upper right corner).
Step 9 :- Go back to the export configuration page and click on the ✔️ icon (upper right corner).
Step 1 :- Click on the “Application Configuration” option.
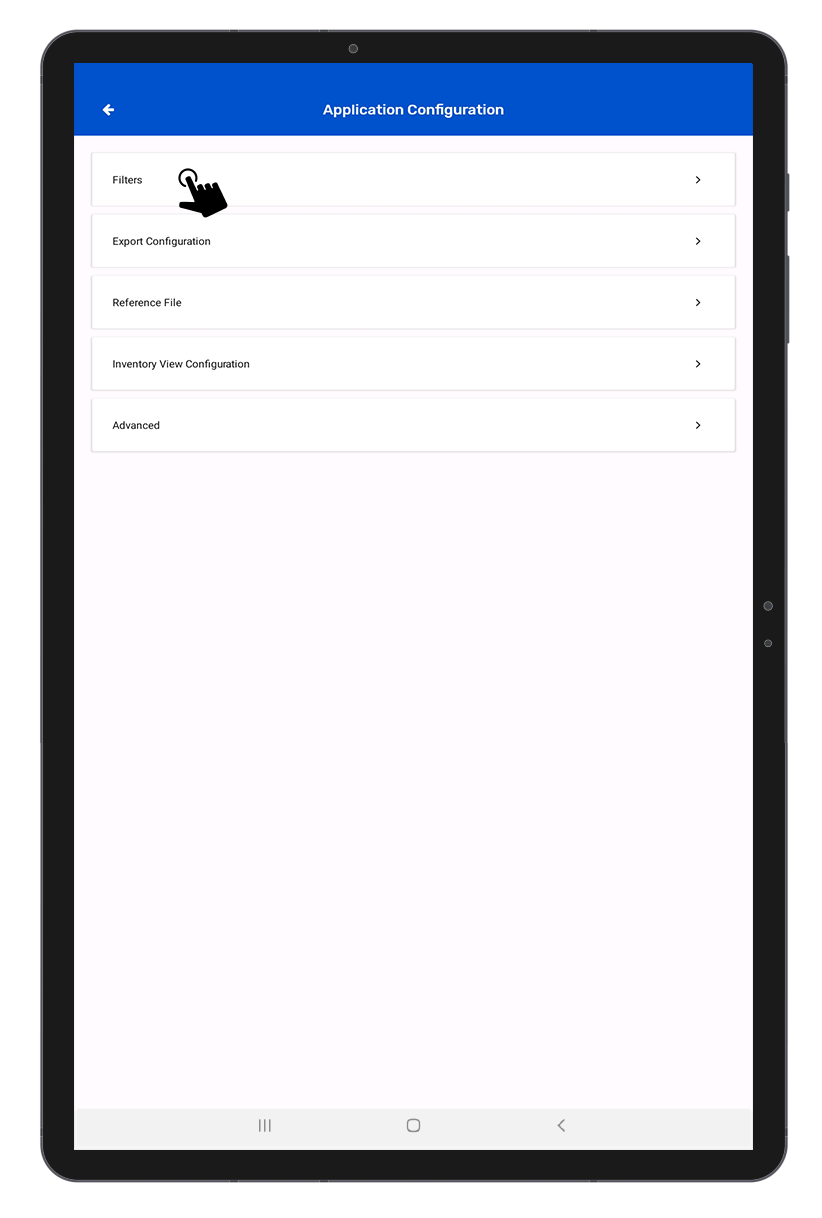
Step 2 :- Click on the “Filters” option.
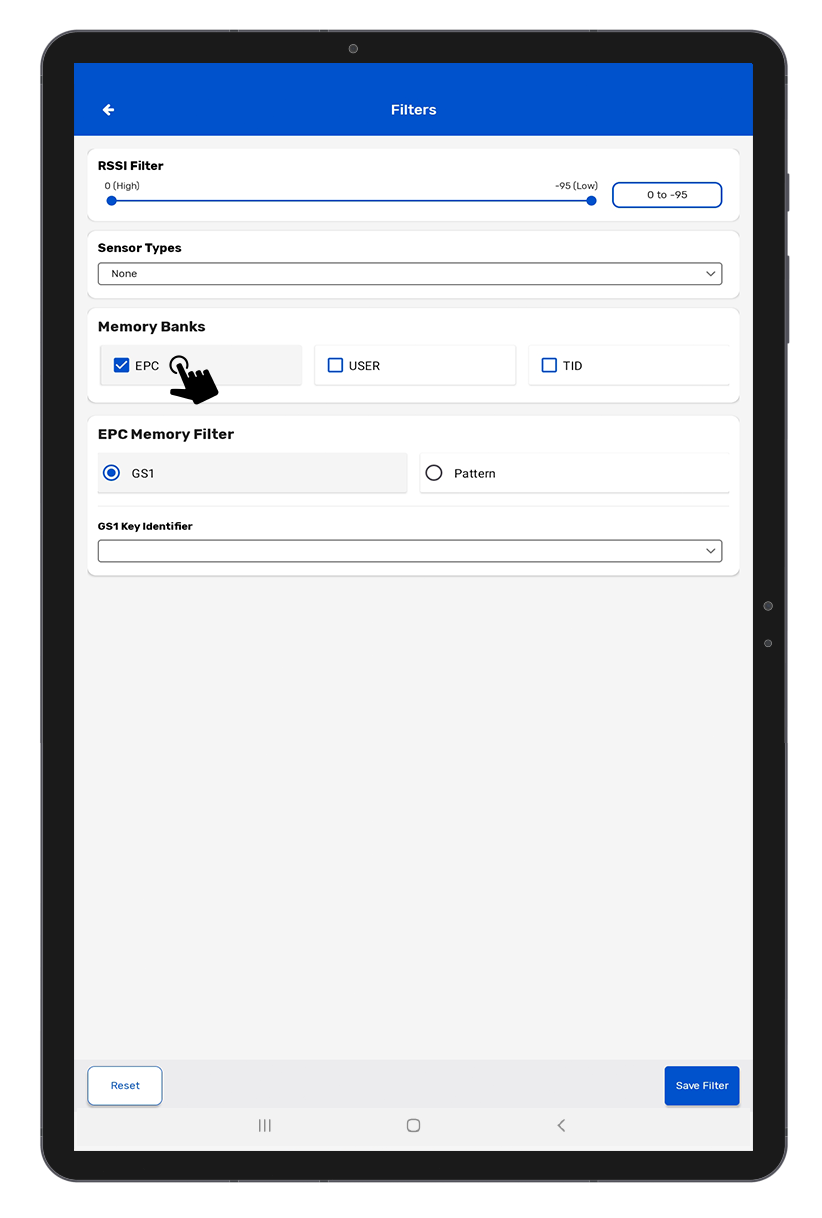
Step 3 :- Select the “EPC” option in the memory bank option.
Step 4 :- Choose the “GS1” option.
Step 5 :- Click on the dropdown menu and choose the “SGTIN” option.
Step 6 :- Click on the “Save Filter” option to save the settings.
RFID tags should be applied before products enter your inventory workflow. This ensures that items are trackable from the moment they are received or shipped.
• Manufacturing stage: Tags can be applied during production.
• Packaging stage: RFID inlays can be embedded in hangtags, price labels, or packaging.
• Distribution stage: Products can be tagged before being shipped to retail stores or customers.
To ensure smooth integration with Shopify, RFID tags must follow GS1 standards:
• EPC Tag Data Standard (TDS): Defines how product information is encoded.
• Global Trade Item Number (GTIN): Ensures each product is uniquely identified.
• Serialization: Each item must carry a unique serial number.
• Data Accuracy: Encoding must match Shopify’s product catalog to avoid mismatches.
We offer multiple solutions to help Shopify retailers implement RFID tagging:
Pre-Encoded, Ready-to-Use RFID Labels
Best for small to medium retailers.
RFID Inlays in Hangtags, Price Labels, or Packaging
Enhances branding with RFID-enabled packaging.
Discover RFID-Enabled Packaging
RFID Printers & Encoders for In-House Labeling
Best for large Shopify retailers with high volume.
Shop RFID Printers & Encoders
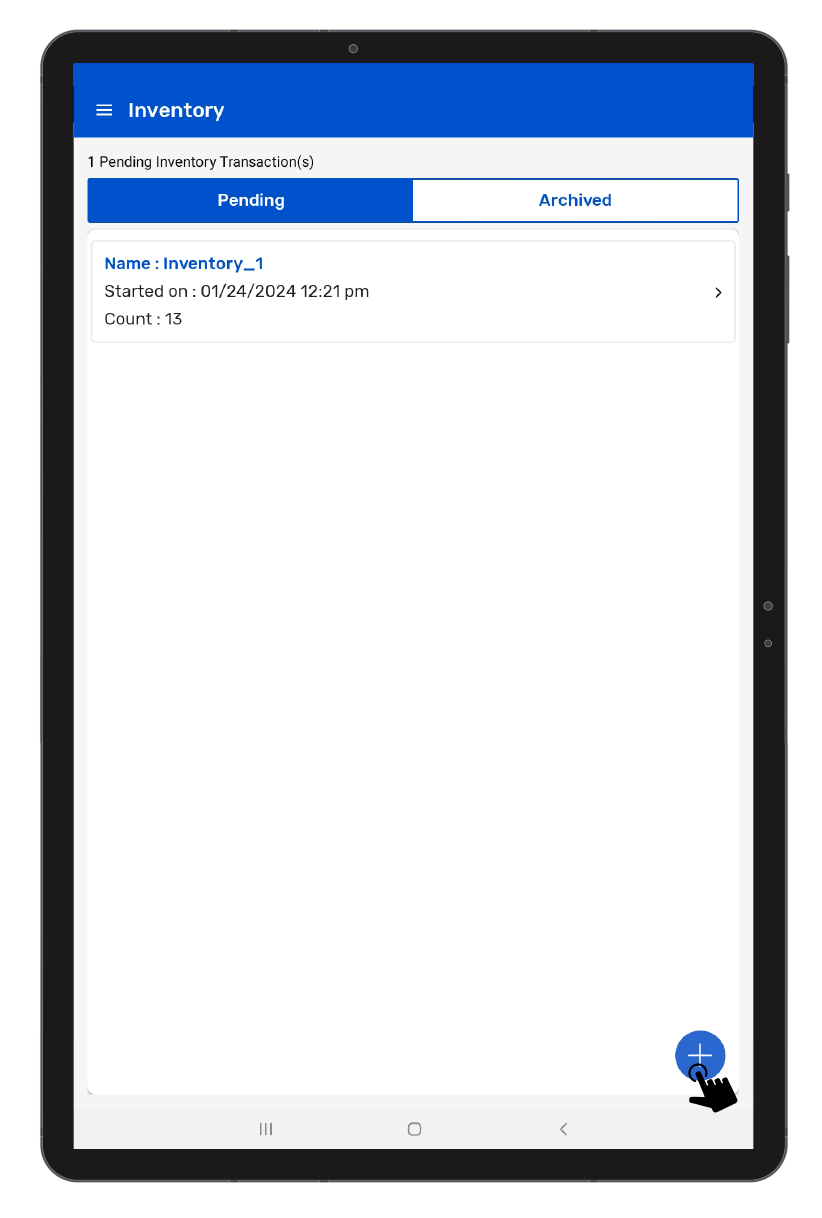
Step 1 :- Click on the "Inventory" option from the home page of the application.
Step 2 :- Click the '+' icon at the bottom right to create a new inventory.
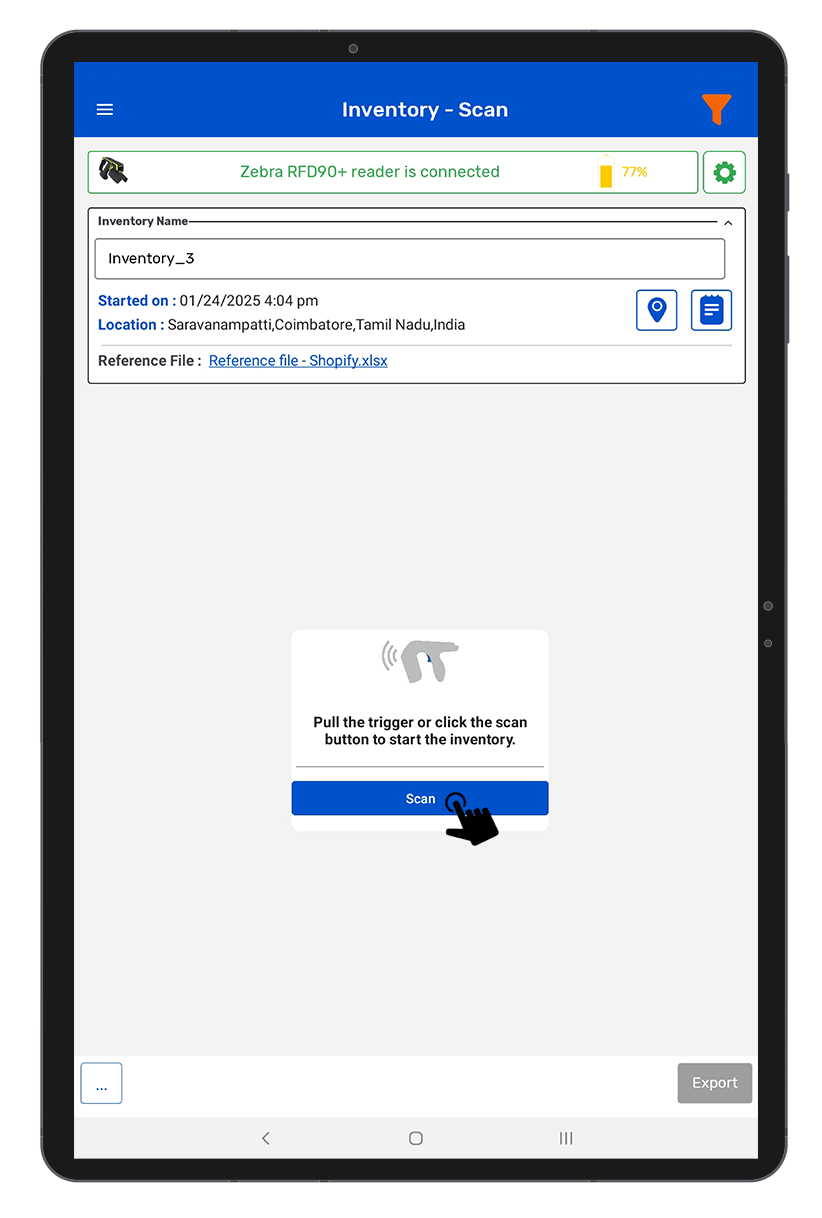
Step 3 :- Click on the "Scan" soft button or press the hard trigger to take the inventory.
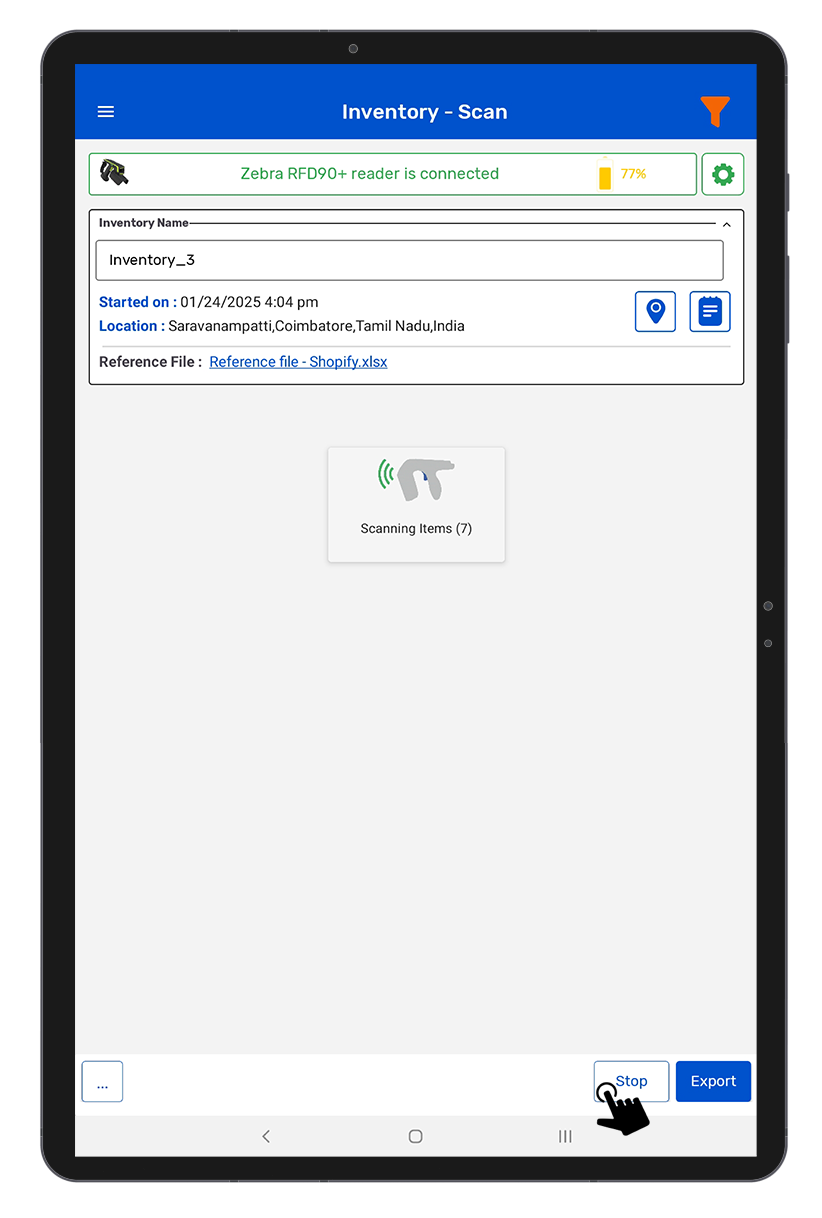
Step 4 :- Click on the "Stop" button to stop taking inventory.
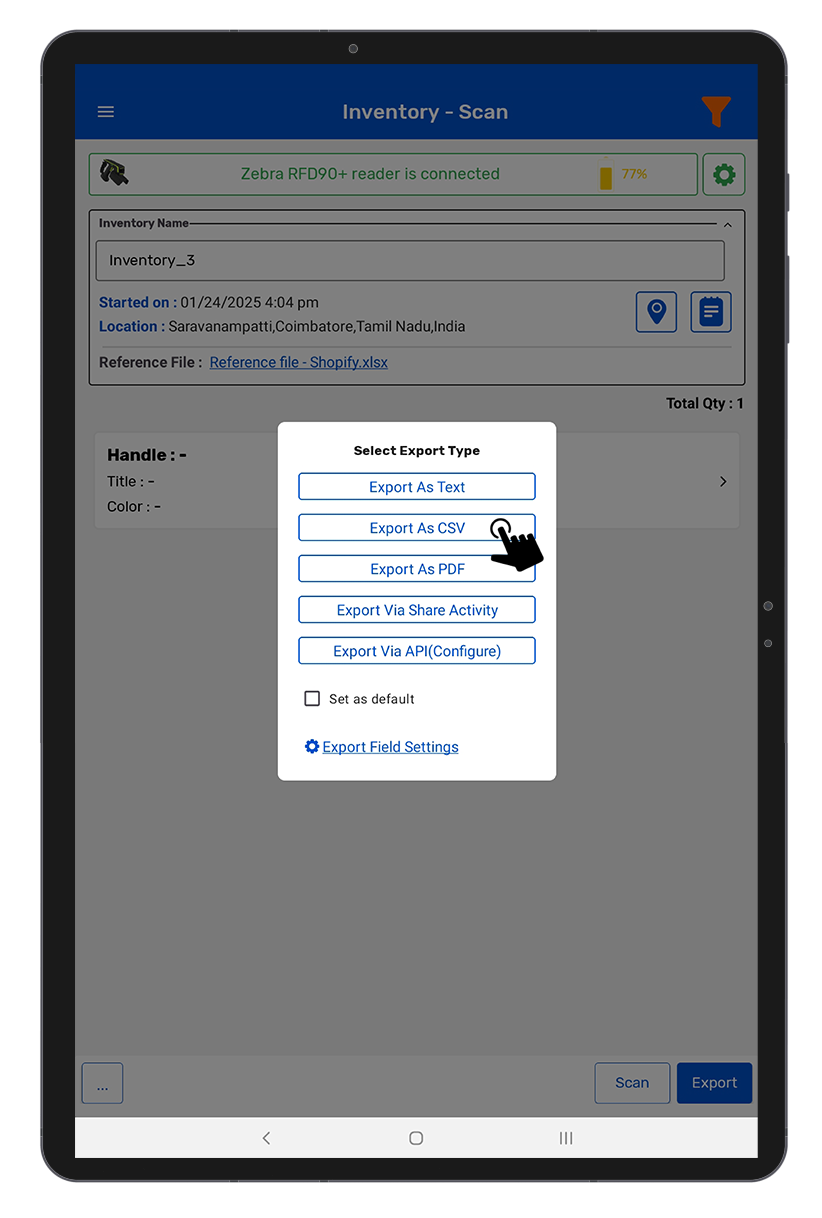
Step 5 :- Click on the "Export" option (bottom right side).
Step 6 :- Click on the "Export as CSV" option.
Step 7 :- Select the location where you want to save the export file.
Step 8 :- Click on the "Allow" option to export the file.
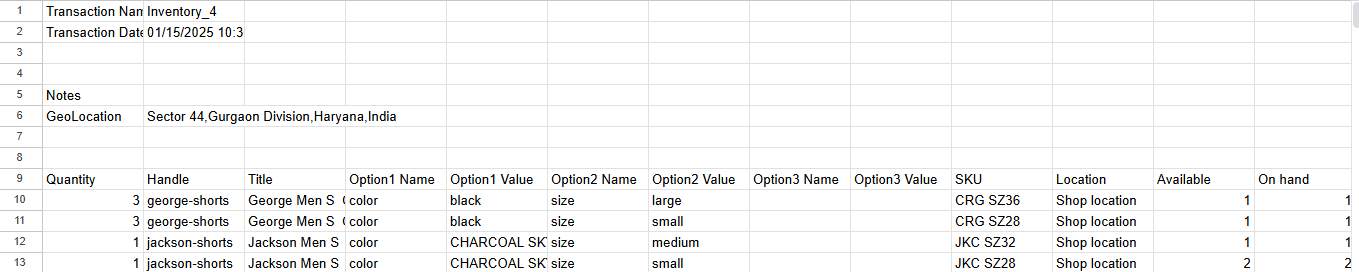
First, you need to modify the export file with simple steps so that it can be imported easily.
1. First, move the export file to your system and open it in Excel or a spreadsheet program.
2. Delete the File Header from row 1st to row 8th.
3. Copy the values from the Quantity column and paste them into the Available and On Hand columns. Then delete the Quantity column.
4. Save the file in CSV format.
Now, switch back to Shopify to import your inventory.
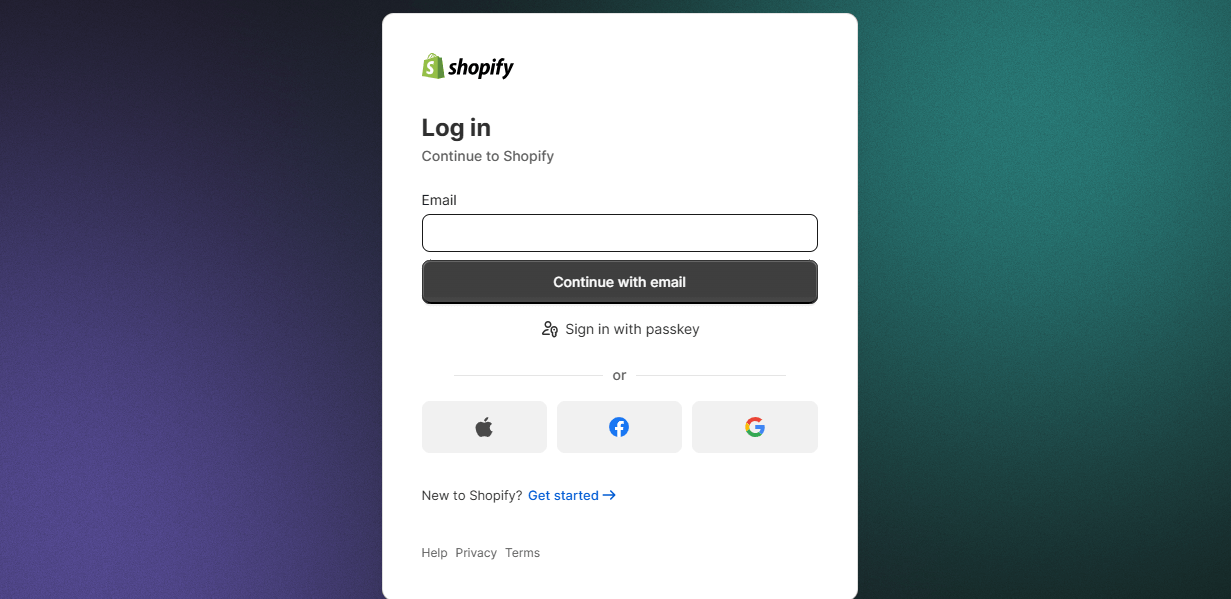
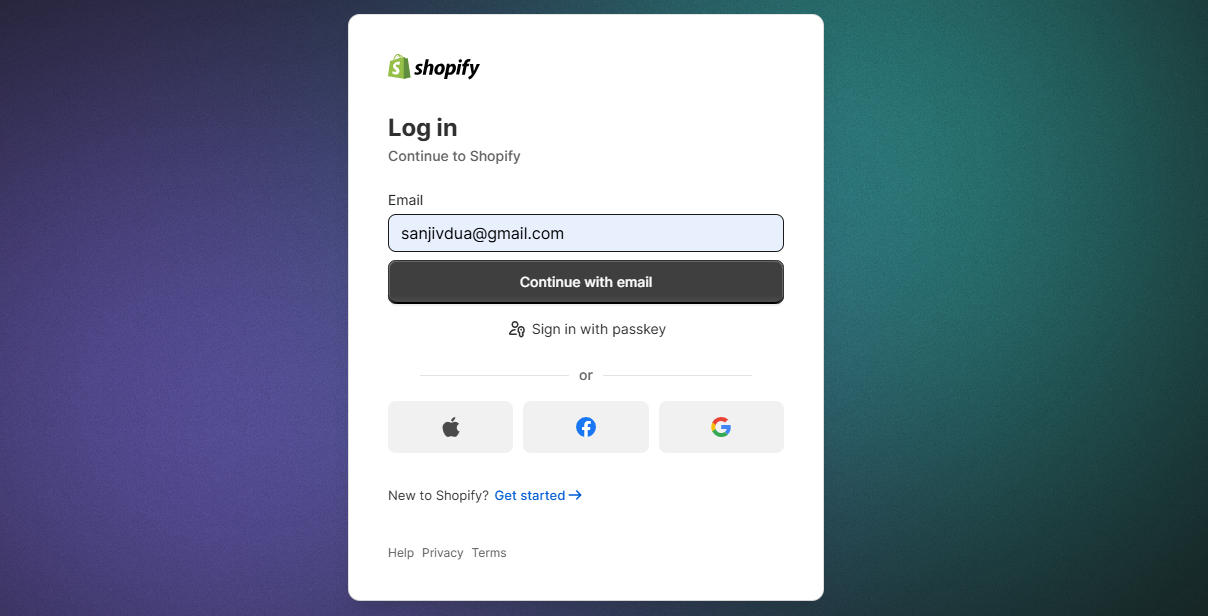
Step 1 :- Open Shopify and log in.
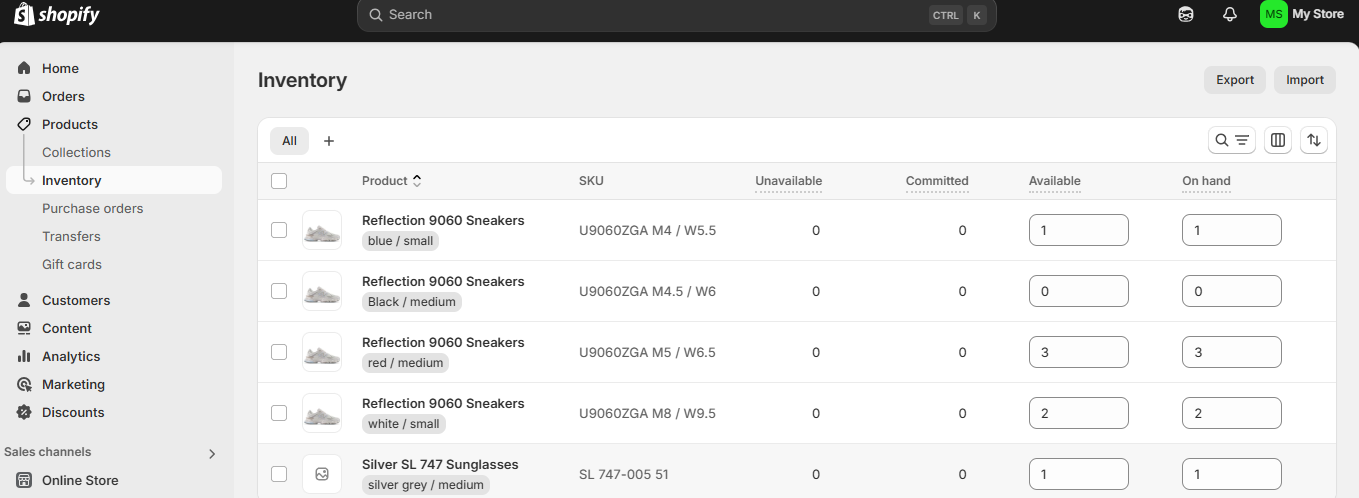
Step 2 :- Click on the Inventory option, and then click on the 'Import' option in the upper right.
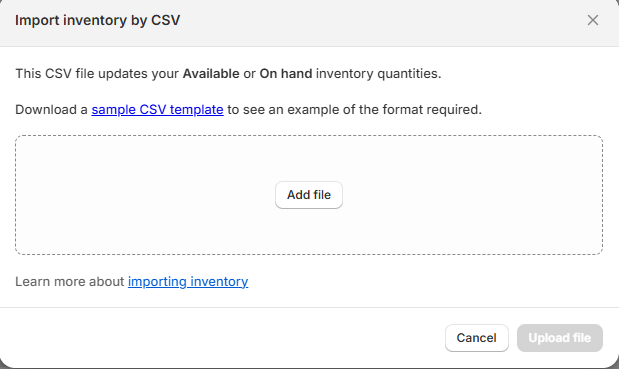
Step 3 :- Click on the "Add file" option.
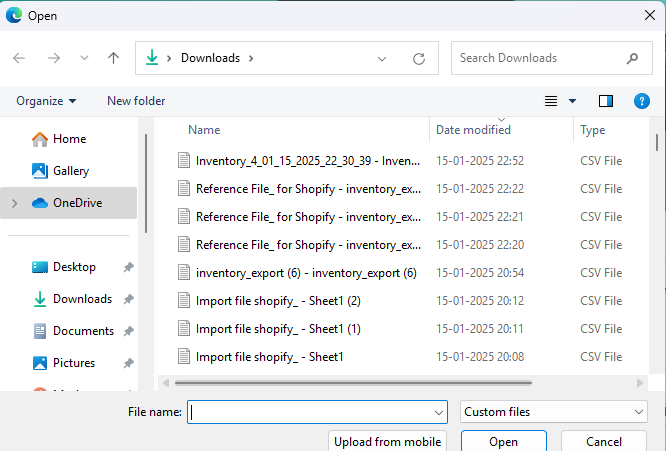
Step 4 :- Select the Inventory export file.
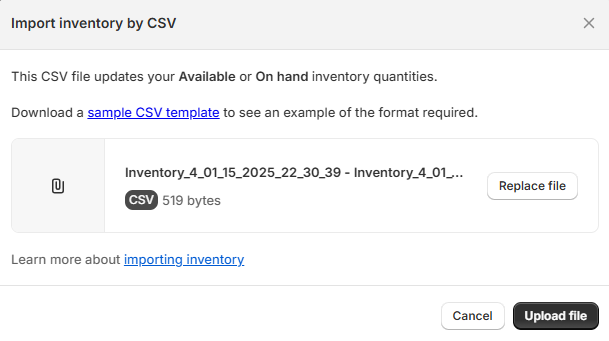
Step 5 :- Click on the "Upload and preview" option.
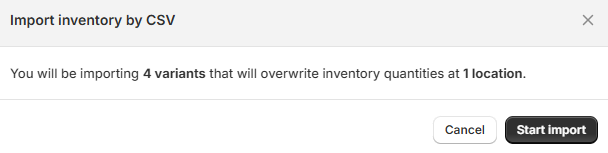
Step 6 :- Click on the "Start Import" option.
You can see the imported items in Shopify as illustrated in the image above.
To sync your TagMatiks application with your store, you must first export your current product and inventory data.
In Shopify, navigate to the Products->Inventory section and you will be redirected to the Inventory page.
Click Export in the top right corner.
In the pop-up window, select:
• All Quantity Types
• All Variants
• Export as CSV for Excel/Numbers
Click Export Variants.
Open the downloaded CSV, copy the data, and paste it into the ‘Inventory’ sheet of your RFID4U Template.
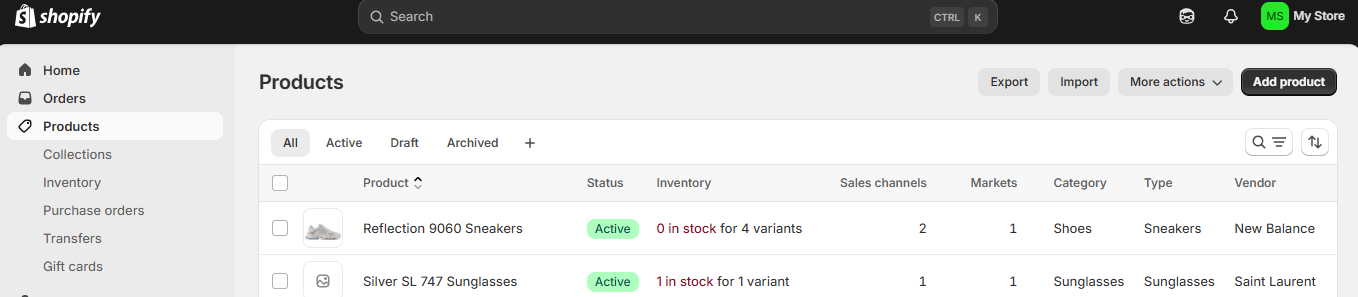
Navigate to the Products section in Shopify.
Click Export and select:
• All Products
• Export as CSV for Excel/Numbers
Click Export Products.
Open the file, copy the data, and paste it into the ‘Products’ sheet of your RFID4U Template.
The Reference File links your Shopify data to the RFID tags.
Open the Template File and navigate to the Reference File sheet.
Tags Association with the products
Go to Extensions > Macros > Update Reference.
Once the macro completes, the sheet will be filled with all the details.
The complete data can be copied from Reference file and paste as values on the other tab called "Manual Reference File”.
Note: Manual Reference FIle is filled up with example data.
5. Make Sure Available and On Hand Columns are filled always with 1.
6. For all quantities of the same items, all the rows will be filled up with the same values and EPC (RFID Tag Data) can be captured on the EPC column by using any barcode reader or type manually in each row sequentially. Please refer the image below where identical rows are highlighted with light yellow:
Note: To capture QR code in the excel sheet, Put the cursor in excel where the QR code on the pre printed RFID Tags needs to be scanned.
7. Download/Save this specific sheet (Manual Reference File Sheet only) as a CSV file.
Open TagMatiks Wedge and go to Application Configuration.
Select Reference File > Browse File and upload the CSV you just created.
Go to Header Mapping and set:
• System Field: EPC(hex)
• Reference Field: EPC
Click Add, then Save.
After saving, you will be redirected to Inventory Configuration.
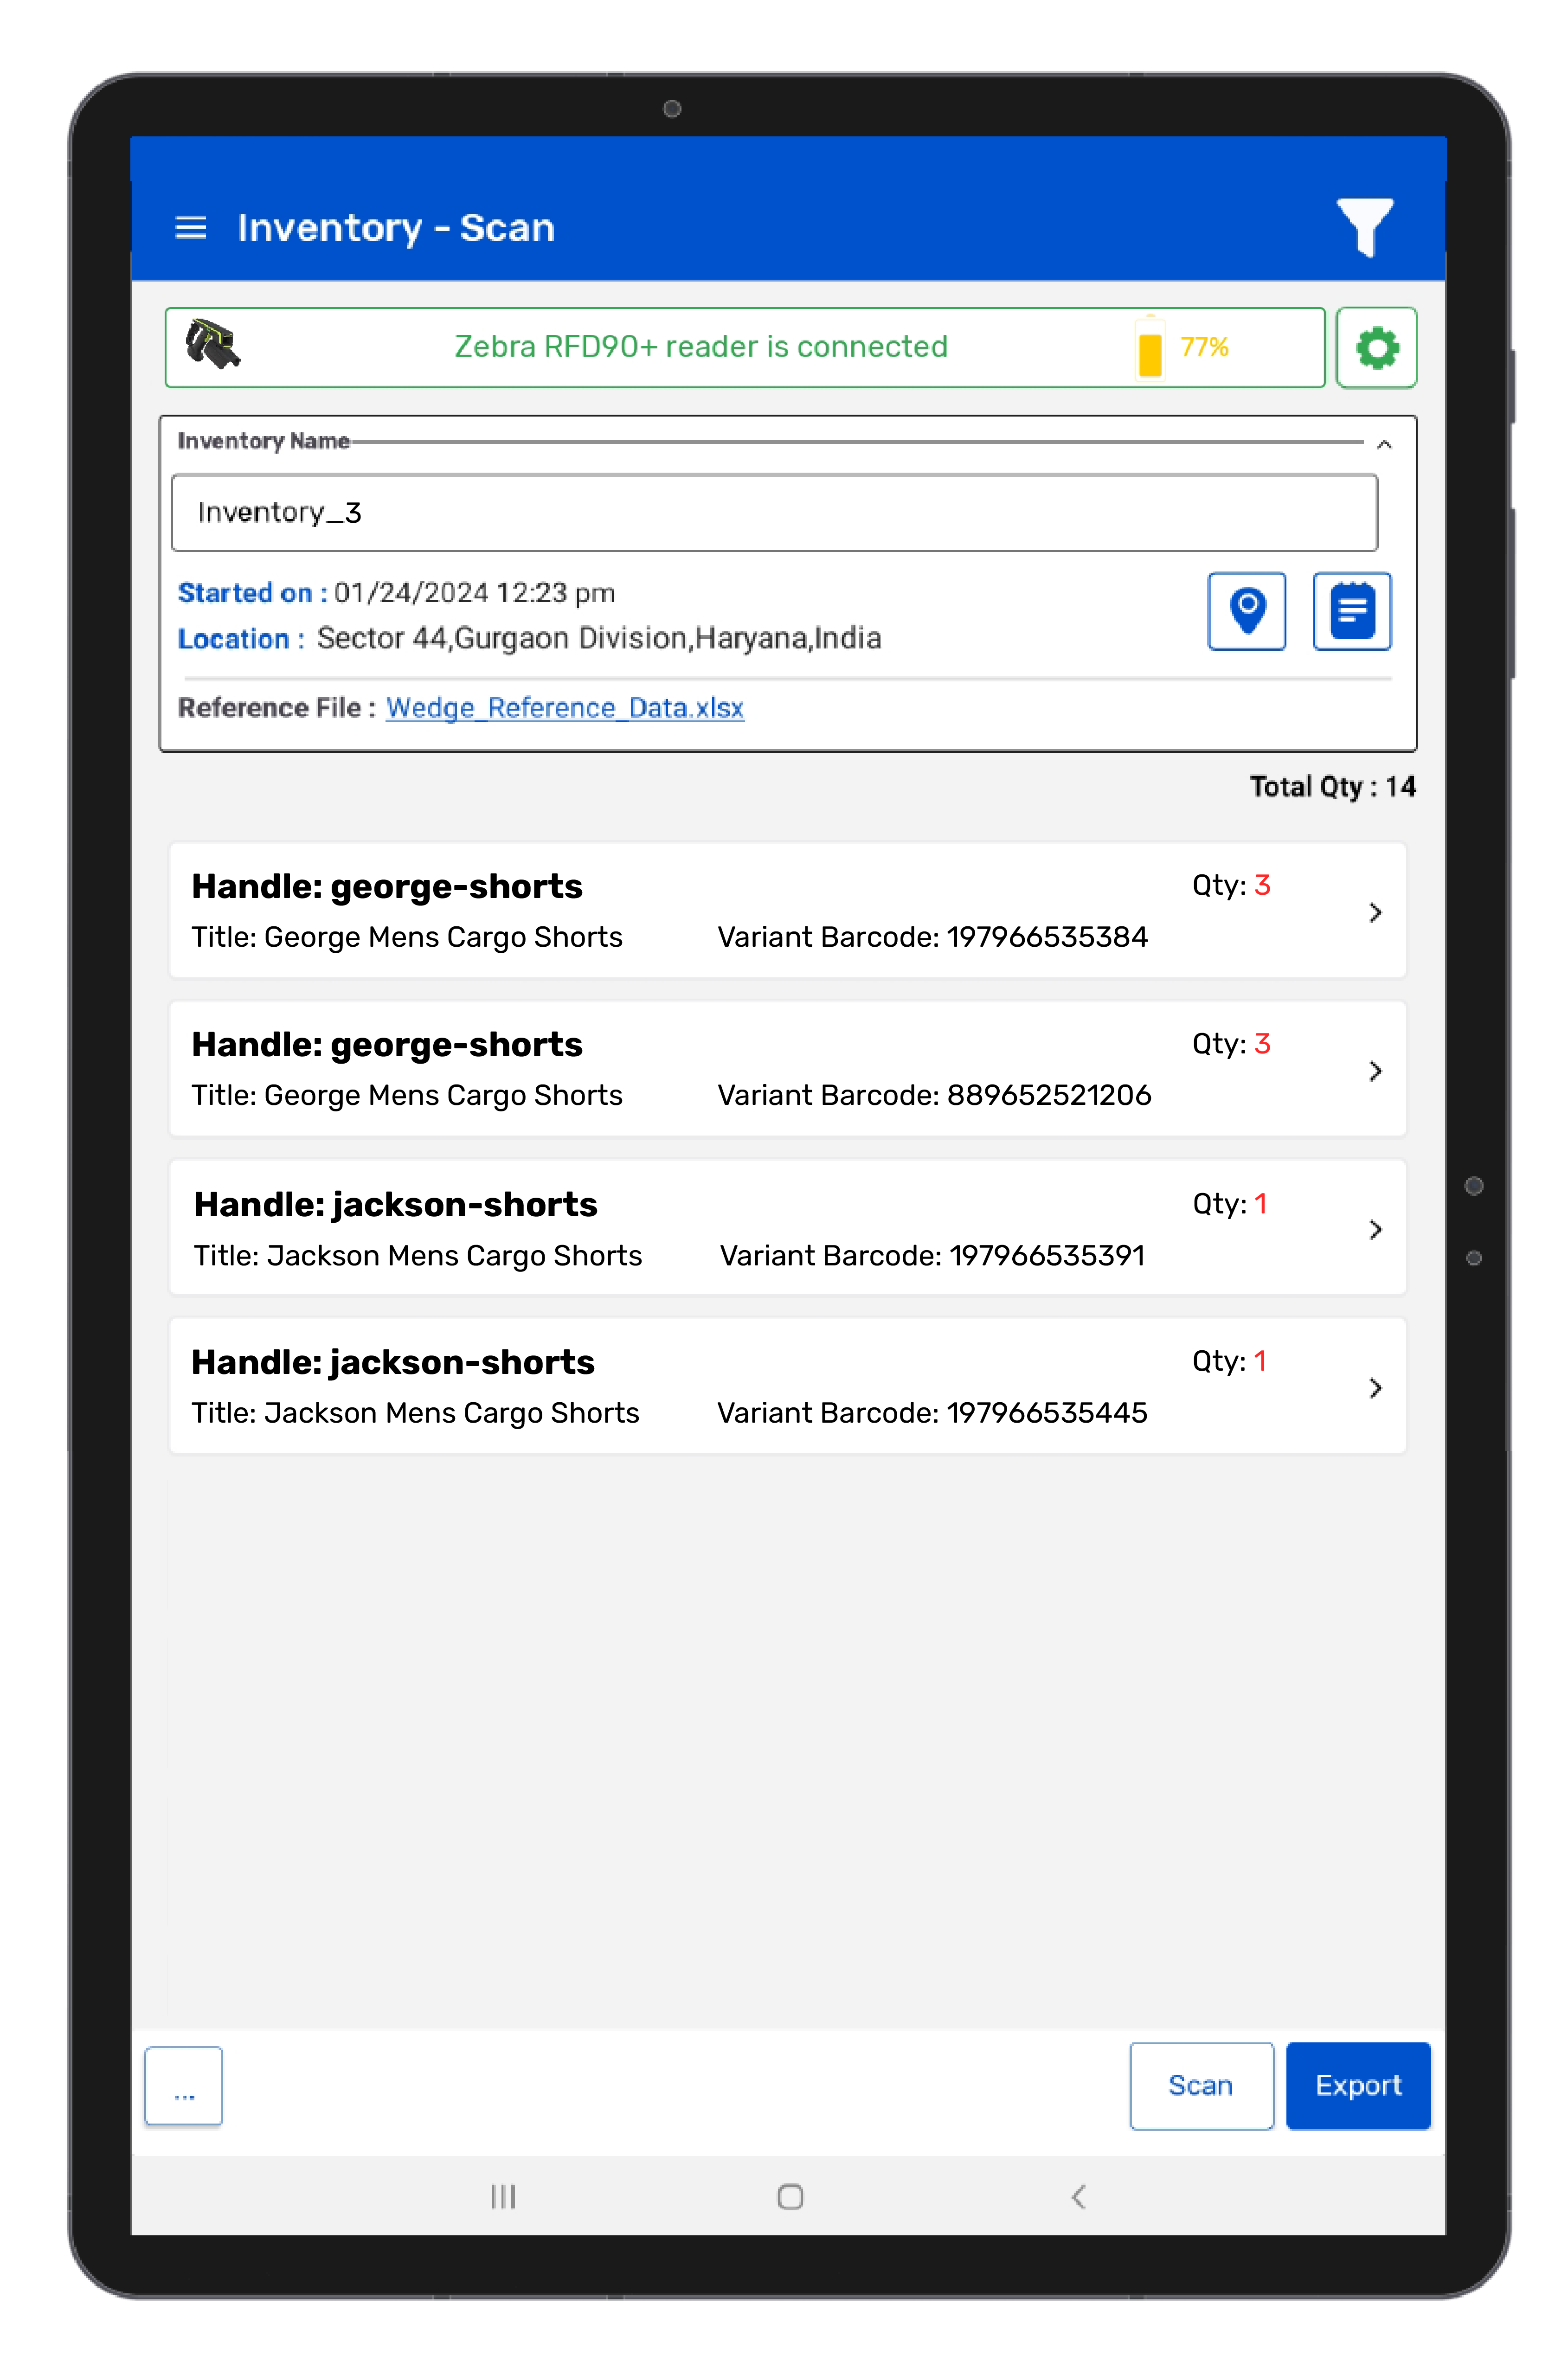
Select the fields you want to see during scanning. Recommended:
• Handle
• Title
• SKU
• Variant Barcode
Note: Fields can be changed as per your requirement.
Click Save.
Export Config: Click on Export Configuration.
2. Enter the Prefix.
3. Click on the “Field Settings” option, swipe left to right, and click on the edit icon.
4. Select the fields you want to see in your export file. Suggested fields are:
• Quantity
• Handle
• Title
• Option 1 Name
• Option 1 Value
• Option 2 Name
• Option 2 Value
• Option 3 Name
• Option 3 Value
• SKU
• Location
• Available
• On Hand
Note: Make sure to uncheck EPC
5. Click on the ✔️ icon (upper right corner).
6. Go back to the export configuration page and click on the ✔️ icon (upper right corner).
On the Home Screen, tap Inventory.
Tap the (+) icon to start a new session.
Press the Scan button (or hardware trigger) to read RFID tags.
Once finished, tap Stop, then Export.
Choose Export as CSV and save the file to your device.
Before importing to Shopify, you should follow the steps below:
Open the exported CSV in Excel.
2. Delete the File Header from row 1st to row 8th.
3. Copy the values from the Quantity column and paste them into the Available and On Hand columns. Then delete the Quantity column and save the file.
Login Shopify, go to Inventory > Import.
Click Add File and select your modified CSV.
Click Upload File and Preview, then Start Import.
Your Shopify inventory levels are now updated based on your RFID scans.
What is TagMatiks Wedge and why do I need it?
TagMatiks Wedge is an android application that enables RFID-based inventory management. It integrates with Shopify to streamline product tracking, reduce manual errors, and keep stock levels updated in real time.
Do I need a special RFID handheld device?
Yes, TagMatiks Wedge requires an android RFID handheld reader to scan and capture EPC (Electronic Product Code) data from RFID tags.
Can I use this integration with pre-printed or custom RFID tags?
Yes, the workflow supports both pre-printed and custom tags, as long as EPC values are properly captured and mapped in the Reference File.
Why do I need to export data from Shopify first?
Exporting product and inventory data ensures that TagMatiks Wedge has the latest information about your store’s items. This data is then linked to RFID tags via the Reference File.
What is the RFID4U Template File used for?
The template organizes Shopify exports into structured sheets (Products, Inventory, Reference File, Manual Reference File) so they can be mapped correctly to RFID tags.
What happens if I forget to fill the “Available” and “On Hand” columns with 1?
TagMatiks Wedge relies on these values to validate inventory counts. Leaving them blank or incorrect may cause mismatches during scanning and exporting.
What is the Reference File?
The Reference File links Shopify product data (SKU, Title, Variants) with RFID tag EPCs. It ensures scanned tags correspond to the correct products in Shopify.
How do I capture EPC values?
EPCs can be scanned using a barcode reader or entered manually into the EPC column of the Reference File. Each identical item must have its own EPC entry.
Why do I need to copy data into the Manual Reference File?
The Manual Reference File acts as a finalized version of the Reference File, ensuring clean data for upload into TagMatiks Wedge.
What fields should I configure for Inventory View?
Recommended fields include Handle, Title, SKU, and Variant Barcode. However, you can customize based on your operational needs.
Why do I need to uncheck EPC and File Headers in Export Config?
These fields are not required for Shopify import and may cause formatting issues if left enabled.
What filter should I select for EPC?
Choose GS1 > SGTIN to ensure EPCs are interpreted correctly for product identification.
How do I start an inventory session?
From the TagMatiks Wedge home screen, tap Inventory, then the (+) icon to begin scanning. Use the hardware trigger to capture RFID tags.
What format should I export the scanned data in?
Export as CSV. This format is required for cleaning and re-importing into Shopify.
Why do I need to clean the exported CSV before importing?
Shopify requires “Available” and “On Hand” columns to be populated. Copying values from the Quantity column ensures compatibility.
Can I directly upload the TagMatiks export file to Shopify?
No. You must first adjust the file by copying Quantity values into Available and On Hand, then removing the Quantity column.
How do I confirm the import worked?
After uploading, Shopify will show a preview. Once imported, check your Inventory section to confirm updated stock levels.
My EPCs are not mapping correctly. What should I check?
Ensure EPC values are unique per item, correctly entered in the Reference File, and mapped under System Field: EPC(hex) and Reference Field: EPC in TagMatiks Wedge.
The import file is rejected by Shopify. Why?
Common causes include missing headers, incorrect column names, or leaving EPC/File Headers enabled in the export configuration.
Can I run multiple inventory sessions at once?
No. Each session must be completed, exported, and cleaned before importing back into Shopify.